
Knowledge Base
Articles In This Section
How Workato Actually Works: A Simple BreakdownWorkato Workflow Apps: A Complete OverviewHow to Build Your First Recipe in Workato Getting Started with Data Orchestration in WorkatoUnderstanding Webhooks in WorkatoWorkato FAQs: The Ultimate List of Common Workato FAQsHow to Sync your SurveyMonkey Data within Quickbase using WorkatoWhat is WorkatoUnderstanding Workato Custom Connectors How to use Workato's Logging SystemHow to use GitHub Secret Scanning for your Workato Developer API10 Key Benefits of WorkatoHow to Use Workato to Send an Email through Outlook What is Workato ONEHow to Connect Workato to RingCentralHow to Set Up HTTP Requests in Workato: Built-in and Custom What is an MCP Server and Why It Matters for your AI Foundation How to Build a Workato Center of ExcellenceHow to use Data Tables in Workato: Step-by-Step GuideHow to Use Conditional Actions in Your Workato Recipe How to Set Up a Call Ended Trigger in Workato for RingCentralHow to Create a New App Connection in WorkatoGetting Started with Data Orchestration in WorkatoWhat is Workato ONEHow to Manage API Clients and Client Roles in WorkatoHow to Process File Attachments in WorkatoSections
How to Set Up HTTP Requests in Workato (Built-in and Custom)
HTTP requests are a foundational component of integrations in Workato, enabling communication between Workato recipes and external systems via APIs. By sending and receiving data through standard HTTP methods such as GET, POST, PUT, and DELETE, users can interact with virtually any service that exposes an API.
Workato simplifies this process by providing flexible tools to configure endpoints, authentication, headers, and request bodies directly within a recipe. This allows teams to quickly build integrations that extend beyond pre-built connectors and support custom or less common applications.
Understanding how HTTP requests work in Workato is key to unlocking more advanced and customizable automation capabilities.
Basic HTTP Request in Workato (Example)
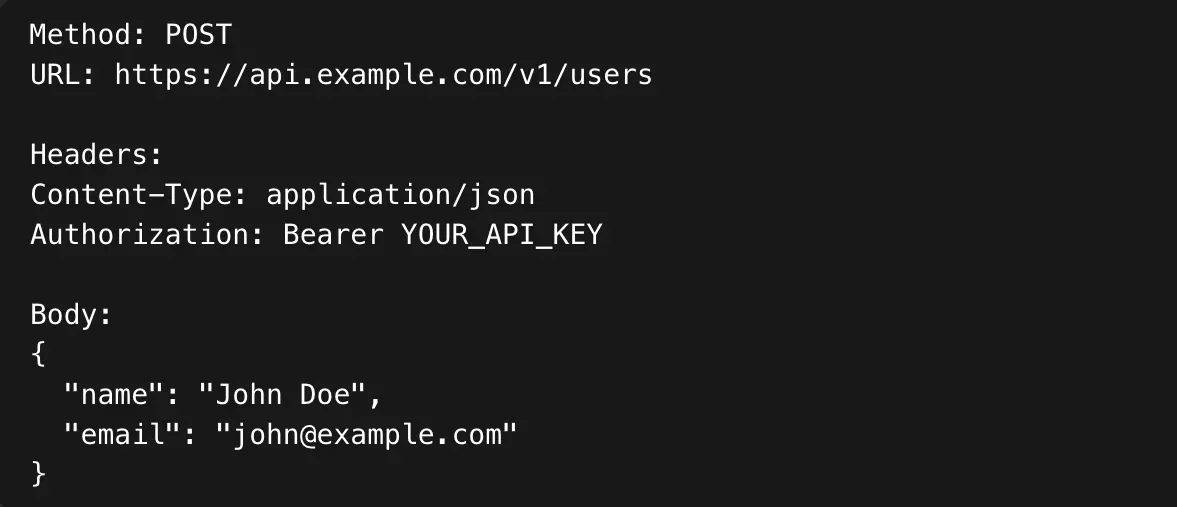
In a basic Workato recipe, you typically use the “HTTP” app → “Make a request” action.
You’ll configure:
- Method:
GET,POST,PUT,DELETE, etc. - URL: The API endpoint (e.g.,
https://api.example.com/v1/users) - Headers:
Common ones:Authorization: Bearer <token>Content-Type: application/json
- Query params (for GET requests)
- Request body (for POST/PUT)
What are the Options for HTTP Requests in Workato
There are two primary approaches to setting up HTTP requests in Workato: using the built-in HTTP connector for quick, one-off calls, or creating a custom connector for more scalable, reusable integrations.
The right approach depends on your specific needs, such as the complexity of the API, authentication requirements, and how frequently the connection will be used.
This article walks through both options, helping you understand when to use each and how to get started.
When to Use Built-in vs. Custom Connectors in Workato
Choosing between Workato’s built-in connectors and custom connectors depends on the complexity, frequency, and scalability needs of your integration.
Use a built-in HTTP connector when:
- You need to make a quick, one-off API call
- The integration is simple and doesn’t require reuse
- You are testing or prototyping an endpoint
- The API has minimal authentication and straightforward request/response structures
Built-in connectors are ideal for speed and simplicity, allowing you to get up and running quickly without additional setup.
Use a custom connector when:
- You plan to reuse the same API across multiple recipes
- The API requires complex authentication (e.g., OAuth2)
- You want to standardize and centralize logic (actions, triggers, error handling)
- The integration involves multiple endpoints or workflows
- You need a more maintainable and scalable solution
Custom connectors are better suited for long-term use, especially in team environments where consistency and reusability are important.
In short, start with the built-in HTTP connector for speed and flexibility, and move to a custom connector when your integration needs become more structured and repeatable.
Option 1: Using the Workato Built-In HTTP Connector (easiest)
Step 1: Create or open a Recipe
- Go to Recipes → Create recipe
- Choose a trigger (e.g., webhook, schedule, app event)
Step 2: Add an Action
- Click + → Add action
- Search for “HTTP”
- Select HTTP → Make a request
Step 3: Method
Select the configuration Method from following options
GET(retrieve data)POST(create data)PUT/PATCH(update)DELETE(remove)
Step 4: URL
Configure the URL by entering the API endpoint
- Example format: https://api.example.com/v1/users

Step 5: Headers
- Click “Add header"
- Make sure to use description headers that are easy to recall, as well as include things like:
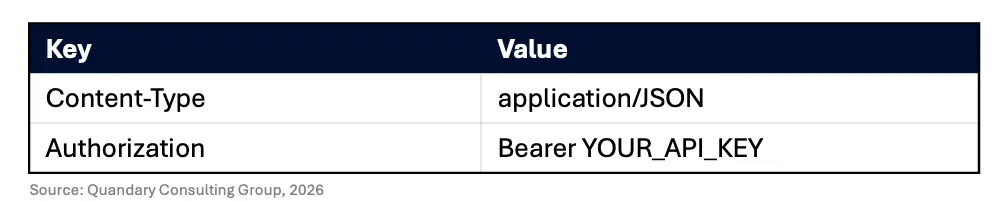
Step 6: Set Parameters
- Query Parameters (for GET)
- Workato has a separate section to add these as key-value pairs.

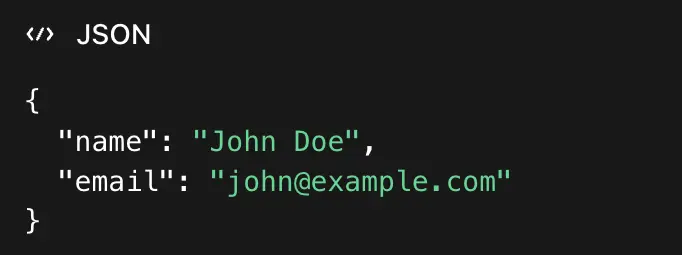
Step 7: Body (for POST/PUT)
- Switch to Raw → JSON
- Enter the following (see image directly below)
Step 8: Test the step
- Click “Test”
- Check for two things:
- Status code (200 = success)
- Response body
Step 9: Publish the Connector
- Once validated, click “Release”
- Your connector will now be available for use in recipes
Common Mistakes to Avoid When Using the Built-In HTTP Connector in Workato
- Missing
Content-Type: application/json - Using wrong HTTP method
- Invalid JSON (extra commas, quotes)
- Auth token not formatted correctly (
Bearermatters) - Forgetting query params
Option 2: Using the Custom Connector in Workato (advanced)
Creating a custom connector allows you to build reusable, structured integrations for APIs you plan to use frequently or that require more advanced configuration.
Step 1: Navigate to the Connector SDK
- Go to Tools → Connector SDK in Workato
- Click “Create new connector”
Step 2: Define Basic Information
- Enter a name for your connector
- (Optional) Add a description for documentation purposes
Step 3: Configure the Base URL
- Set the Base URI (e.g.,
https://api.example.com) - This will be used across all actions in the connector
Step 4: Set Up Authentication
Choose the appropriate auth type based on the API:
- API Key (header or query)
- Basic Auth
- OAuth2 (for more complex integrations)
Configure required fields (e.g., client ID, secret, tokens)
Step 5: Define Actions
Actions represent API endpoints (e.g., GET users, POST contacts):
- Click “Add action”
- Specify:
- HTTP method (GET, POST, etc.)
- Endpoint path (e.g.,
/v1/users) - Input fields (what data the user provides)
- Request structure (headers, body, params)
Step 6: Define Output Fields
- Map the expected response from the API
- This allows downstream steps in recipes to use the data
Step 7: Add Triggers
- Create triggers if the API supports polling or webhooks
- This is an option step; however, it is highly recommended that you do add Triggers for your custom connection to keep your Workato Schema structure clean
Step 8: Test the Connector
- Use the built-in test feature to validate requests and responses
- Debug any errors (auth, formatting, etc.)
Step 9: Publish the Connector
- Once validated, click “Release”
- Your connector will now be available for use in recipes
What are the Key Benefits of Using HTTP Connections in Workato
Whether you use the built-in HTTP connector or create your own custom HTTP connector, HTTP connections in Workato provide a flexible and powerful way to integrate with external systems, especially when pre-built connectors are unavailable or insufficient. By leveraging standard API communication, they enable teams to extend automation capabilities beyond native integrations.
- One of the primary benefits is universality. Since most modern applications expose APIs, HTTP requests allow Workato to connect with virtually any service, regardless of whether a dedicated connector exists.
- Another key advantage is flexibility and control. Users can fully customize request methods, headers, query parameters, and payloads, making it possible to handle complex or non-standard integration requirements.
- HTTP connections also support rapid development and testing. They allow users to quickly prototype integrations, validate endpoints, and iterate without the overhead of building a full custom connector.
- Additionally, they provide a pathway to advanced integrations. For organizations with unique workflows or proprietary systems, HTTP requests enable deeper customization and scalability when paired with custom connectors.
Overall, HTTP connections are an essential tool in Workato for building adaptable, scalable, and comprehensive integrations.
To learn more about HTTP connections, visit: Workato HTTP V2 Connections Overview
- By: John Orsak
- Email: jorsak@quandarycg.con
- Date updated: 06/14/2025
FAQs: HTTP Connections in Workato
1. What is an HTTP connection in Workato?
An HTTP connection in Workato allows users to send and receive data from external APIs using standard HTTP methods such as GET, POST, PUT, and DELETE.
It enables integration with systems that do not have pre-built connectors, making it a flexible option for custom automation workflows.
2. When should I use the HTTP connector instead of a pre-built connector in Workato?
You should use the HTTP connector when a pre-built connector is not available or when you need more control over the API request.
It is ideal for custom integrations, testing endpoints, or working with less common applications that expose APIs but are not natively supported in Workato.
3. What authentication methods are supported for HTTP requests in Workato?
Workato supports multiple authentication methods for HTTP requests, including API keys, Basic Authentication, and OAuth 2.0.
These can be configured through headers, query parameters, or dedicated authentication settings depending on the API requirements.
4. What are common issues when setting up HTTP requests in Workato?
Common issues include missing or incorrect authentication headers, invalid JSON formatting in the request body, incorrect HTTP methods, and misconfigured endpoints or query parameters.
Good Rule of Thumb: Testing the request and reviewing the API documentation can help quickly identify and resolve these errors.


© 2026 Quandary Consulting Group. All Rights Reserved.
Privacy Policy