
Knowledge Base
Articles In This Section
How Workato Actually Works: A Simple BreakdownWorkato Workflow Apps: A Complete OverviewHow to Build Your First Recipe in Workato Getting Started with Data Orchestration in WorkatoUnderstanding Webhooks in WorkatoWorkato FAQs: The Ultimate List of Common Workato FAQsWhat is WorkatoUnderstanding Workato Custom Connectors How to use Workato's Logging SystemHow to use GitHub Secret Scanning for your Workato Developer API10 Key Benefits of WorkatoHow to Use Workato to Send an Email through Outlook What is Workato ONEHow to Connect Workato to RingCentralHow to Set Up HTTP Requests in Workato: Built-in and Custom What is an MCP Server and Why It Matters for your AI Foundation How to Build a Workato Center of ExcellenceHow to use Data Tables in Workato: Step-by-Step GuideHow to Use Conditional Actions in Your Workato Recipe How to Set Up a Call Ended Trigger in Workato for RingCentralHow to Create a New App Connection in WorkatoGetting Started with Data Orchestration in WorkatoWhat is Workato ONEHow to Set Up HTTP Requests in Workato (Built-in and Custom)How to Manage API Clients and Client Roles in WorkatoHow to Process File Attachments in WorkatoSections
How to Sync your SurveyMonkey Data within Quickbase using Workato
Surveys are a great way to collect information, with SurveyMonkey being one of the leading tools to do so. When your surveys are completed you can sign into SurveyMonkey and look at all your data. But wouldn’t it be better if the same data was in your central database rather than in yet another system?
Reasons for storing your survey results might include:
- Providing visibility to people who are not SurveyMonkey users
- Allow for reporting across multiple surveys
- Associate responses with users in your database
In this article we’ll discuss how to setup a Workato recipe which save the results of your survey to your Quickbase database application.
How to Sync your SurveyMonkey Data within Workato
First, you’ll want to set up your Quickbase table where you want survey information to be stored.
Log into your Quickbase application and take the following action:
- Create a new table
- Add a text field and call it ‘Question 1’.
- Add another text field and call it ‘Survey ID’
Now log into your SurveyMonkey account:
- Create a new survey
- Select ‘Start from Scratch’
- Name your survey and add a multiple-choice question or text question.
- Save your new survey4Go to collect ‘Responses’ section of your new survey on the tabs in the upper ribbon and click ‘Add a New Collector’ and select ‘Web Link’
- Go to collect ‘Responses’ section of your new survey on the tabs in the upper ribbon and click ‘Add a New Collector’ and select ‘Web Link’
- Copy the resulting URL into your browser and complete at least one survey (This will be used later to display values in the triggers of your Workato recipe).
Now sign into your Workato account:
- Click ‘Create a new recipe’
- Assign the trigger as shown below:
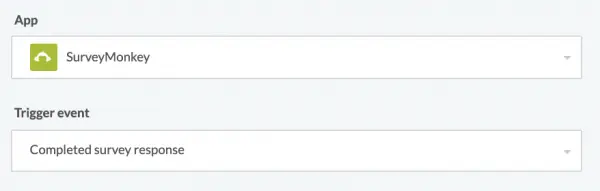
Click ‘Next’
- Assign a connection:
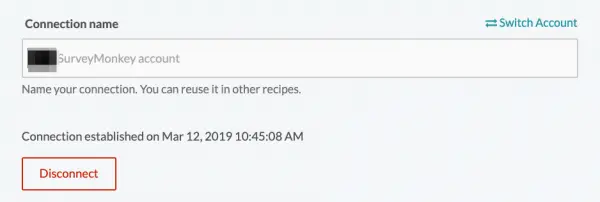
Click ‘Next’
- Designate which survey will be used (the one you set up at the beginning of this article)

- Now you’ll create your action. Select your Quickbase app and the action ‘create record’:
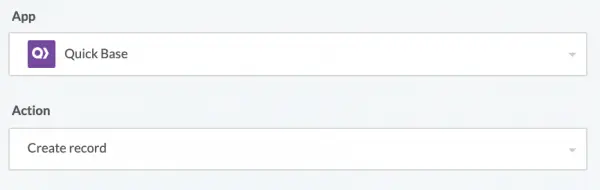
Click ‘Next’
- Select your Quickbase connection and select your sub-domain and authentication information:
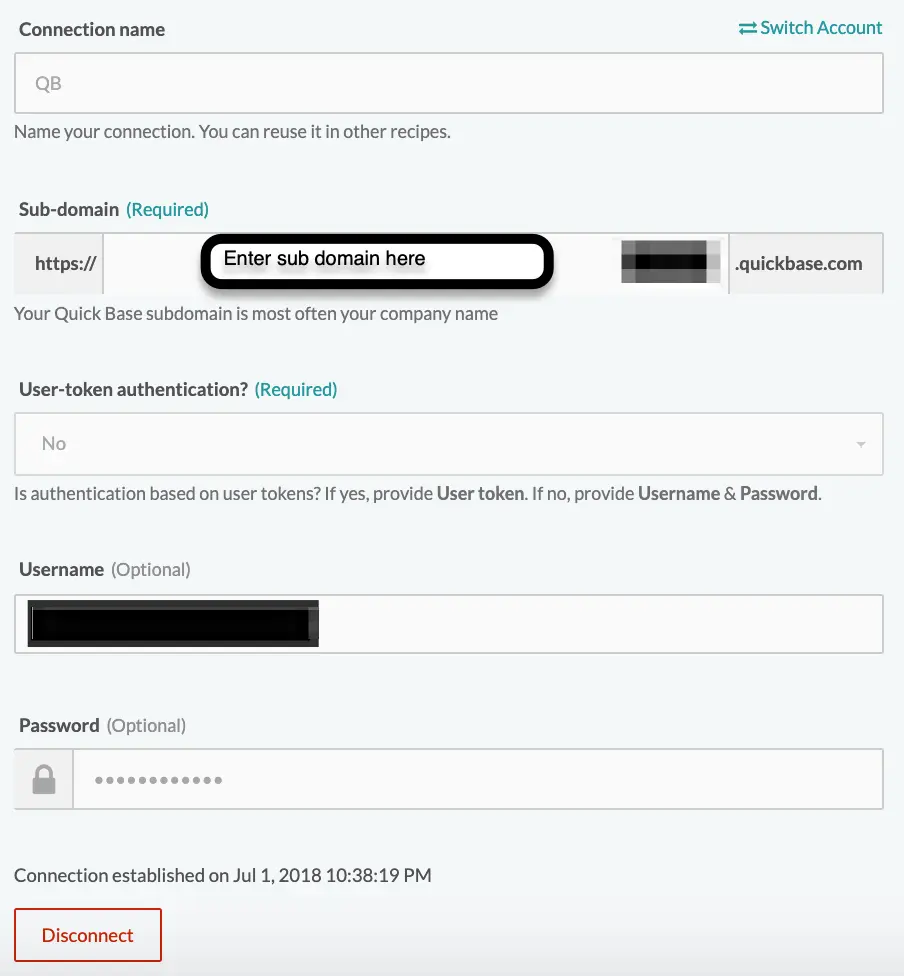
Click ‘Next’
- Now we’ll configure our action. First, select the application where your Quickbase newly created Quickbase table is located.
- Enter your application token and select the table you want your survey data sent:
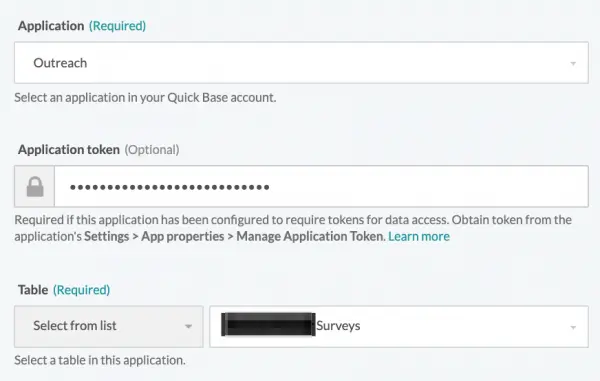
Once the table is selected additional fields will become available. Select the fields that you want to add from your survey to your Quickbase application.
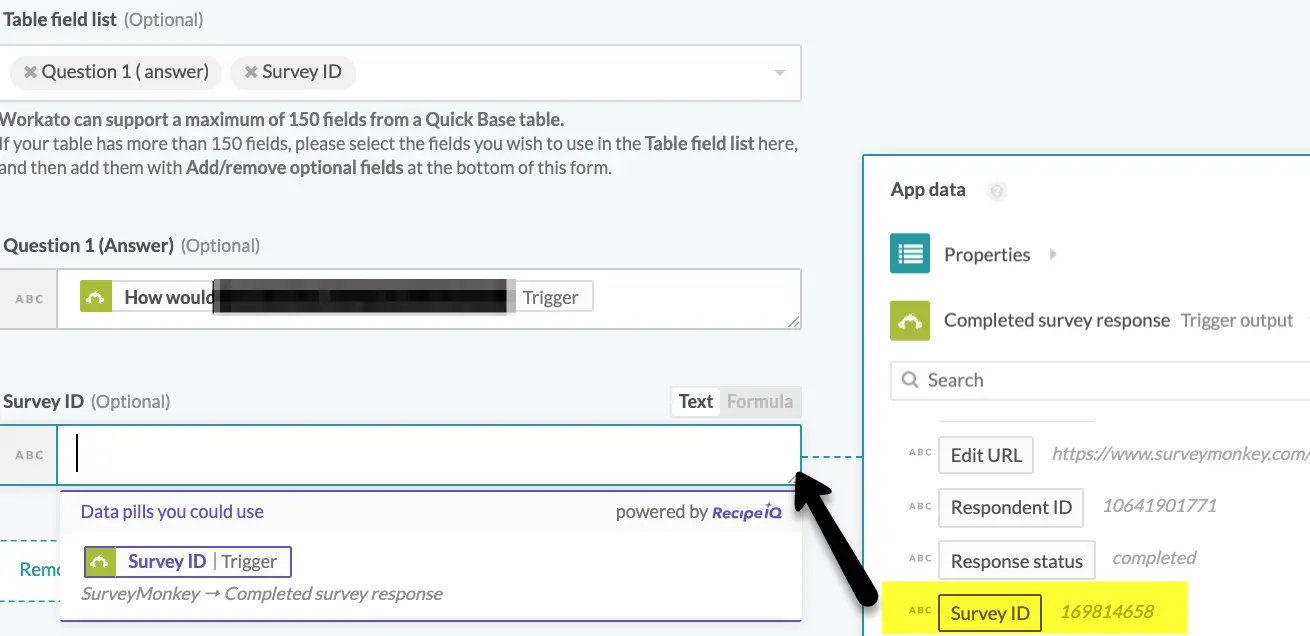
To do, start by selecting the desired fields from the ‘Table field list’:

The fields you’ve selected will now appear below. In each field you’ll select the SurveyMonkey response that will be mapped to Quickbase.
In the screen below you can see that we are assigning values for the fields on the right side of the screen from our list of values in the left side under ‘Completed survey response’
Once completed, click ‘Finish
- Now that you’ve completed your recipe it’s time to test. Click the green 'Test Recipe' button in the upper right of your screen to run your first test:
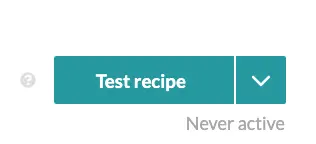
When clicked a test job will be run, creating a record based on the last survey response that was completed in SurveyMonkey.
When the test is complete you should see this message:

You should also see a newly created record in your Quickbase table based on the test you just ran.
If Workato is unable to find any jobs, return to your SurveyMonkey account and complete a test survey. Once completed, rerun your test in Workato.
- Check to make sure a record has been created in Quickbase, this should look like the following image:

We’ve included the Survey ID here to show that you can not only extract information entered by the user, but also underlying information about the survey itself.
In this case we can use the survey ID for the purposes of categorizing and reporting on the survey to which the Quickbase record corresponds.
You can imagine that if you have multiple surveys entering the same table it might be very useful to have a record of which survey was used to create the record.
- By: John Orsak
- Email: jorsak@quandarycg.com
- Date Updated: 11/01/2025


© 2026 Quandary Consulting Group. All Rights Reserved.
Privacy Policy