
Knowledge Base
Articles In This Section
How to Use Custom HTML as a Form Element in Quickbase How to Create Quickbase Form RulesWhen to Use Grid Edit in QuickbaseHow to Creat User-Friendly Forms in QuickbaseSections
Radio Buttons (Hiding the None of the Above) | INTERMEDIATE
Introduction
This article focuses on a step-by-step process on how to take the default Quickbase radio buttons and alter their properties using a JavaScript rich-text formula field to remove one – the none of the above option and two – the layout and positioning. In addition, you will learn about some helpful rules on when to use either radio buttons versus drop-down menus when creating surveys, checklists, or forms.
Radio Buttons vs. Drop-Down Menus
Two important controls are radio buttons and drop-down menus when building out forms, surveys and checklists. Both of them can be used interchangeably when an input is required from a user and should be used in certain scenarios to make it easier for a user to select a given input.
Here are some rules to think about when to use radio buttons:
✓ When you have less than 5 options.
✓ Use radio buttons when you want to emphasize options.
✓ When visibility and quick response is a priority.
Here are some rules to think about when to use drop down menus:
✓ When default option is the recommended option.
✓ When a large number of familiar options are available.
✓ When you have more than 7 options.
Since forms can be very long with large number of options, it becomes tedious for users if he/she has to make extra clicks to fill-in information. The given set of rules above will help you to decide between two controls, radio buttons and drop-down menus, while designing your forms in Quick Base.
Surveys, checklists, and forms in general can all benefit from radio buttons. Using radio buttons decreases clicks, and speeds up completion. And if you are using them on a mobile device, it can help provide a better user experience.
However, there are times that radio buttons can make your forms not as functional or visually pleasing as it could be as shown below.

The upcoming steps will cover how to setup a rich-text formula field to alter the appearance and default properties of radio buttons. Here is a preview of what to expect:
✓ Remove the None of the Above as an option.
✓ Realign the radio buttons to be horizontal instead of vertical
How to Alter the Default Properties on Radio Buttons
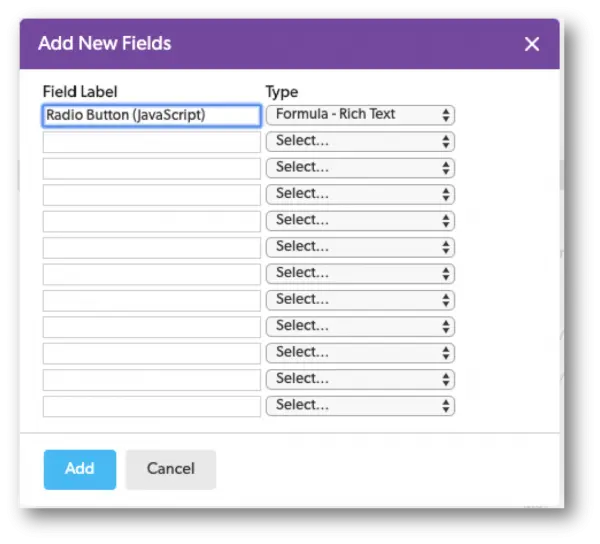
- Create a formula rich-text field. By using JavaScript and the image onload technique, you will be able to get the look and positioning of the radio buttons.
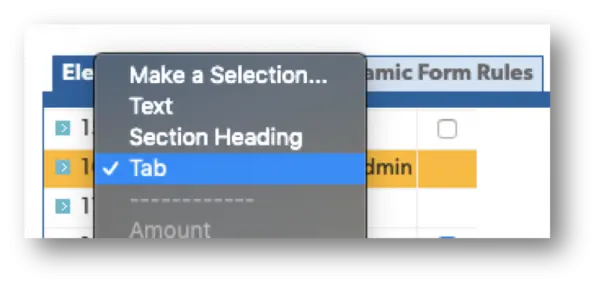
- On the form, create a new tab and name it ‘Admin’. This tab will be used to store the formula rich text field created in the previous step (If you like, you can set up dynamic form rules to hide this tab on your form).
- Since we are using the image onload technique, the first line is an image source of what our radio button(s) will look like on the form.

- Next, we want to define our ‘onload event’. The onload event is most often used within the body element to execute a script once a web page has completely loaded all content (including images). In this case, our form page in Quick Base.

- In lines three and four of our script, we are making a declaration to one – create break between each one of our radio buttons (changing the position of our radio buttons to be horizontal oppose to vertical) and second – remove the ‘None of the Above’ as an option for users to select.

- The last line of our script uses css to help with formatting and spacing between our radio button choices. If you were to comment this out, the radio buttons would look like they are on top of each other as shown below.

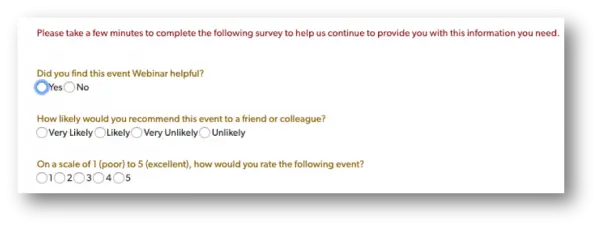
After implementing the rich-text field with the JavaScript outlined above, you should have a similar result shown below:

To see how to put custom HTML into a form element, see our article: Putting Custom HTML as a Form Element | INTERMEDIATE.
- Author: Alex Skudrovskis
- Email: askudrovskis@quandarycg.com)
- Date Submitted: 5/27/2019

Resources


© 2026 Quandary Consulting Group. All Rights Reserved.
Privacy Policy