
Knowledge Base
Tables, Fields, and Relationships in Quickbase | BEGINNER
Tables and fields are foundational building blocks of a database in Quickbase.
Tables store data in a row/column format, similar to a spreadsheet. Relationships connect tables to map data together. These elements help you organize related information so it is easy to access and manage.
Understanding these basics will help you build a solid foundation for your Quickbase app to support your organization’s needs.
Understanding Tables in Quickbase
What Are Tables?
Tables are where all your data lives in Quickbase. Think of them as groups or containers that store information in rows and columns. Each row represents a unique record, and each column represents a field in the record that holds a specific type of information.
Example: A table that contains employee data for a company will have a row for each employee and columns representing employee information such as employee number, name, address, job title, and phone number.

Why Use Tables?
Using tables allows you to separate different types of data so your database stays organized.
For example, you can create an “Employees” table to store basic employee information and a “Payroll” table to track monthly payroll. Instead of creating a new table for each employee, you would add each individual employee as a separate record in the “Employees” table.
Grouping data in this way makes it easy to manage.
Table-to-Table Relationships
Using database tables and relationships improves efficiency by allowing you to enter data once and reuse it multiple times throughout your app. This is known as a table-to-table relationship.
For example, you can create a relationship between the “Employees” and “Payroll” tables, where one employee can have multiple monthly payroll records (a one-to-many relationship). This relationship will allow you to link a payroll record to the appropriate employee so you can create a new payroll record without having to re-enter the employee’s information each time.
How to Create a Table from Scratch in Quickbase
Tips Before You Start
- If you find yourself entering the same type of data repeatedly, consider creating a table.
- Keep table names short and consistent for easy reference.
- Add a description in the table settings to help provide insight into each table’s purpose and usage.
Using Quickbase’s new navigation, you can create a table in one of two ways:
Option A: Using the Visual Builder
1. From the My Apps page, open the app to which you want to add a table.
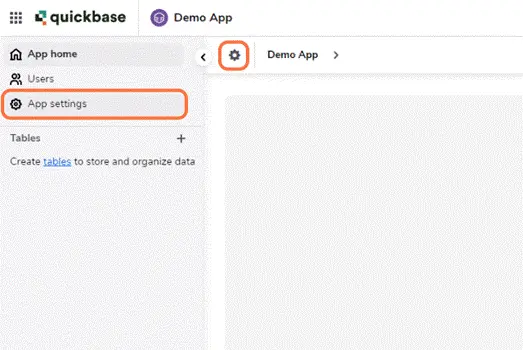
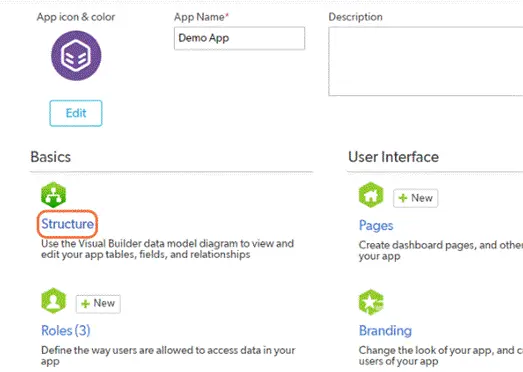
2. Click App Settings in the sidebar or from the App Home page.
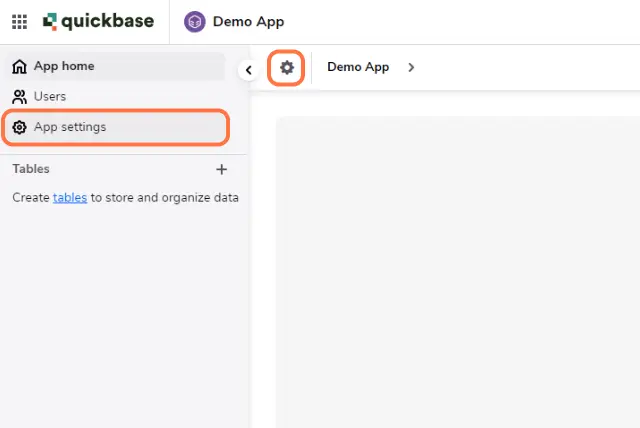
3. Click on Structure to open the Visual Builder.

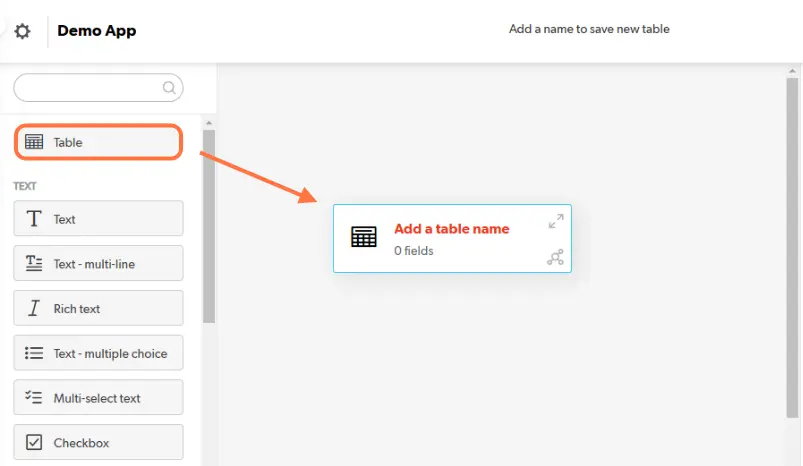
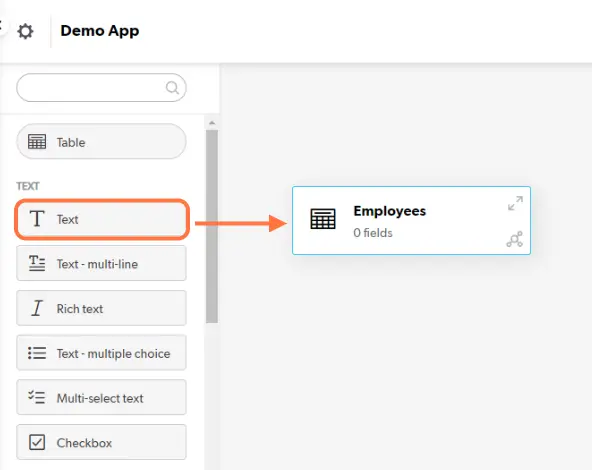
4. From the left column, drag and drop the table element onto the canvas to add a new table.
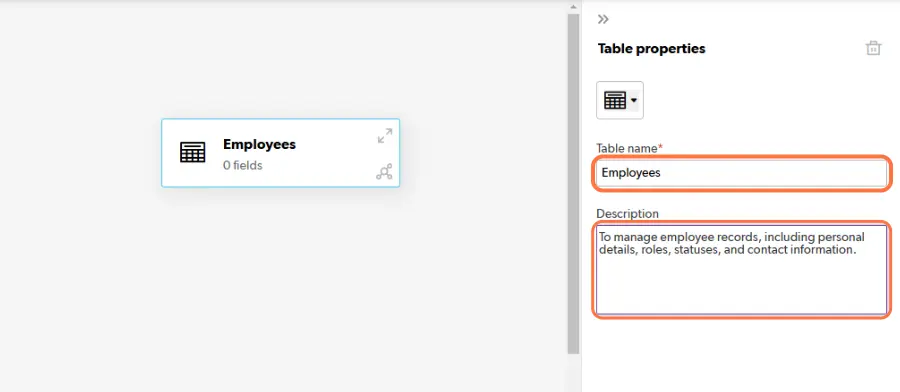
5. Enter the Table Name and Description (optional).
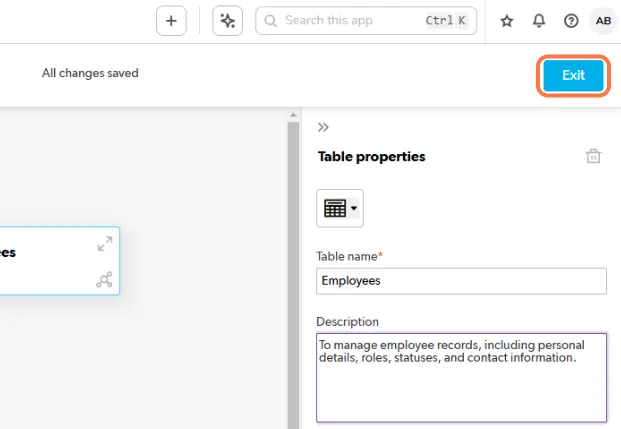
6. Click Exit when you are finished. All changes are saved automatically.
Option B: Using the New Table Feature=
1. From the My Apps page, open the app to which you want to add a table.
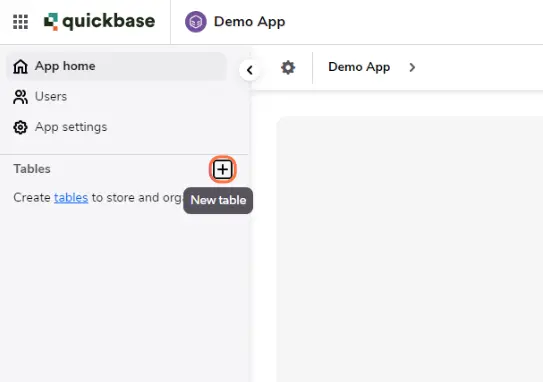
2. Click the + button in the Tables section on the sidebar to add a new table.
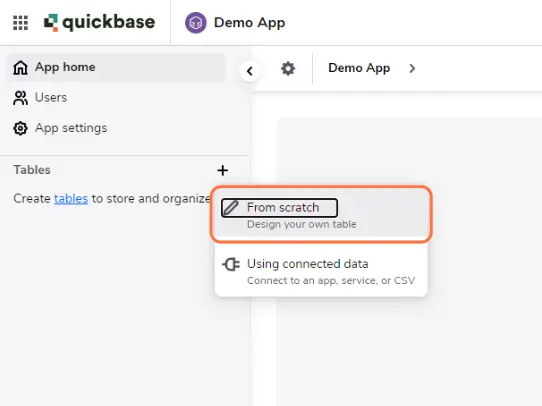
3. Click on From scratch
4. Enter the Table name
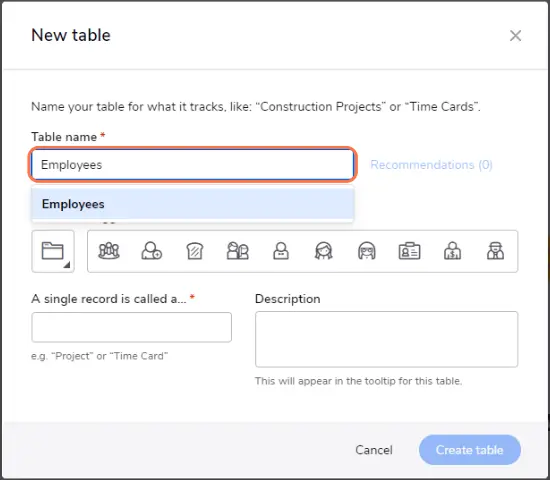
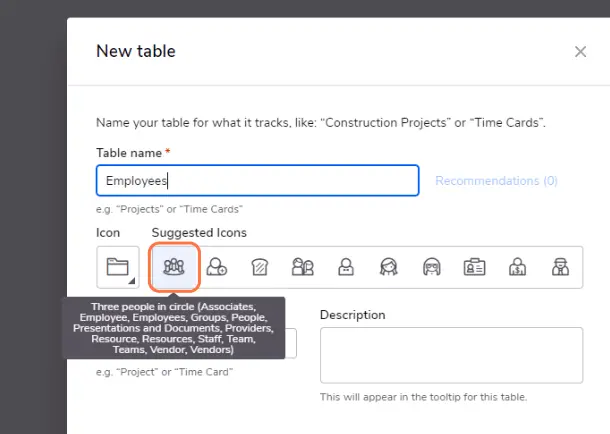
5. Select an icon that best represents your table. Quickbase will suggest icons based on your table name.
6. Enter a single record name (e.g., "Employee").
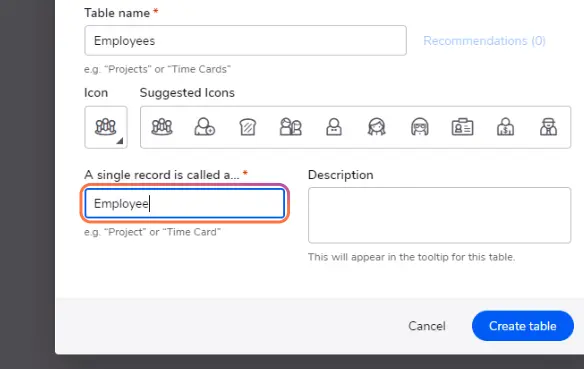
7. Add a description (optional).
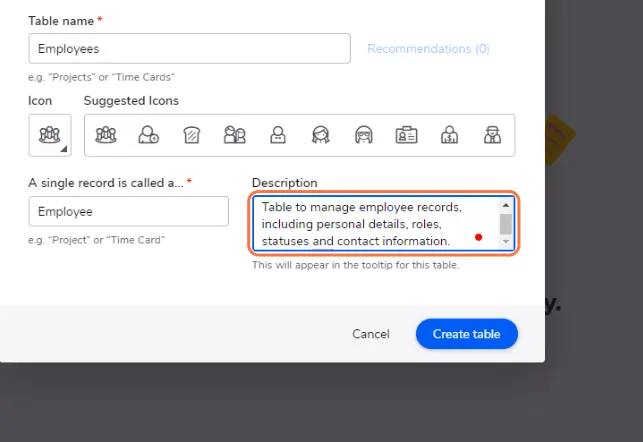
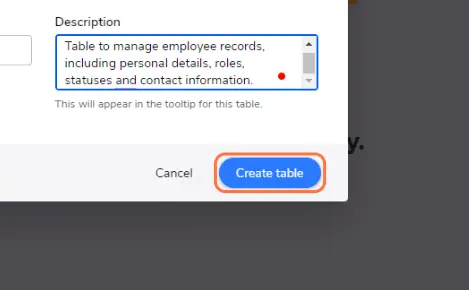
8. Click Create Table to save your changes and add the new table to Quickbase.
Understanding Fields in Quickbase
What Are Fields?
Fields are the columns within a table that store data points for each record. They are where you enter the details for each record and define the type of data that goes into your table, such as text, date, number, etc. Fields are crucial because they keep the information in each record organized and ensure the data remains consistent across the table.
Example: An “Employees” table might include fields for Employee Number, Name, Address, Job Title, and Phone Number. Each represents information that applies to every employee record in the table.
Why Use Fields?
Fields help you organize data in a record that is easy to understand and use. Avoid replicating fields when the data already exists in the database.
For example, do not create an additional Employee Name field in the Payroll table since this information is already stored in the Employees table. Instead, you can use the table-to-table relationship to add a lookup field in the Payroll table that displays the Employee Name from the Employees table.
How to Create Fields in Quickbase
Tips Before You Start
- Field names should be consistent across the application.
- Names should be short and descriptive.
- Add a field description in the field settings to explain the purpose of the field.
- Do not forget to list any dependencies, formulas or notes (if they are an important part of a specific process, such as a pipeline, webhook, or code page).
Similar to Tables, there are two ways to create Fields in Quickbase:
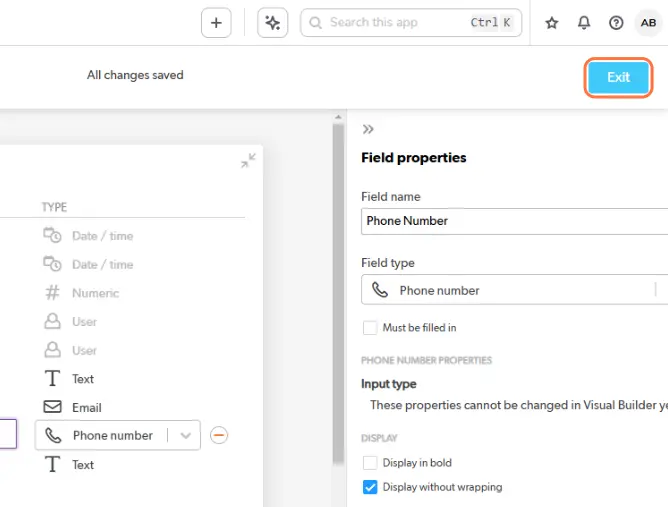
Option A: Using the Visual Builder
1. From the My Apps page, open the app to which you want to add a table.
2. Click App Settings in the sidebar or from the App Home page.
3. Click on Structure to open the Visual Builder.
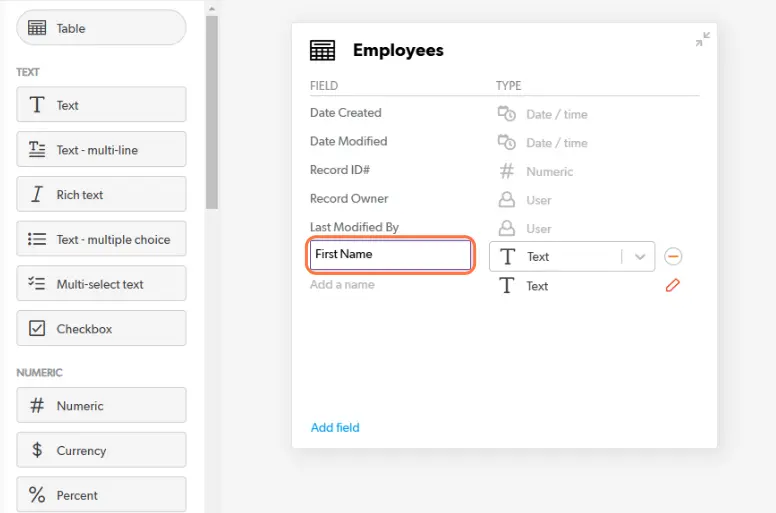
4. From the left column, drag and drop the desired field type into the table where you want to create fields.
5. Enter the Field name.
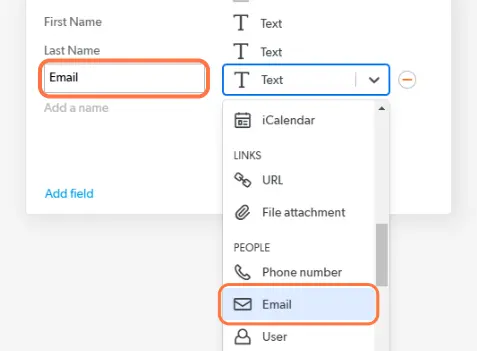
6. You can also use the add field options within the table to add a field name and choose a field type.
7. Repeat steps 4 and 5 or 6 for additional fields.
8. Click Exit when you’re finished. All changes are saved automatically.
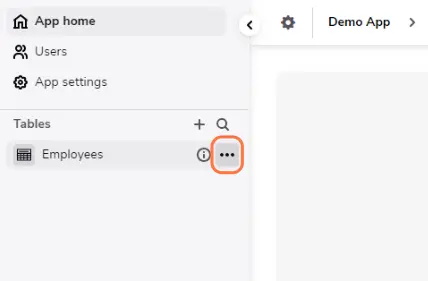
Option B: Using the Table Settings
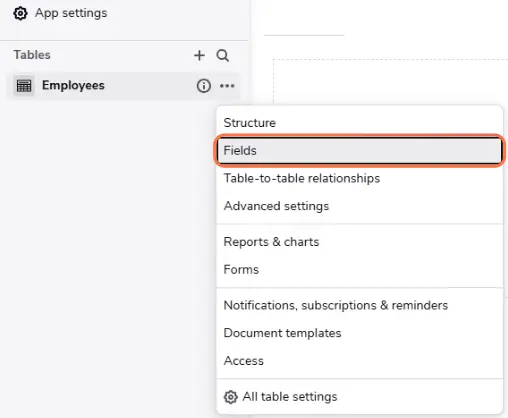
1. In the sidebar, click the three dots next to the table you want to add fields to.
2. Click on Fields.
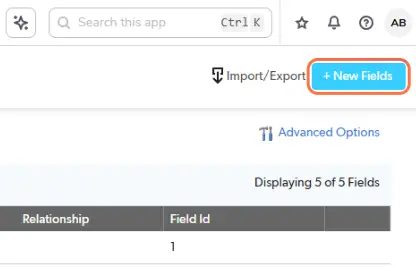
3. Click on + New Fields.
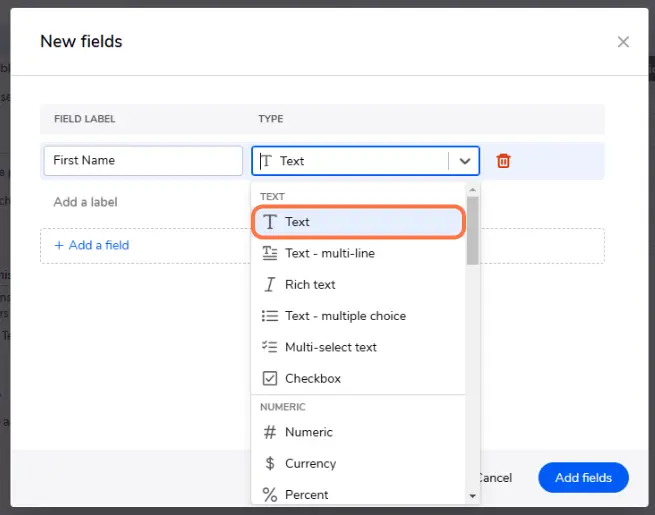
4. Enter a Field name
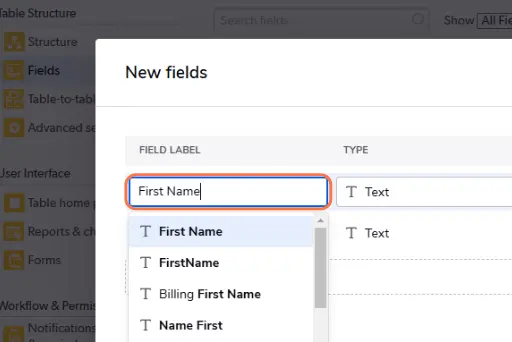
5. Select the appropriate field type from the drop-down.
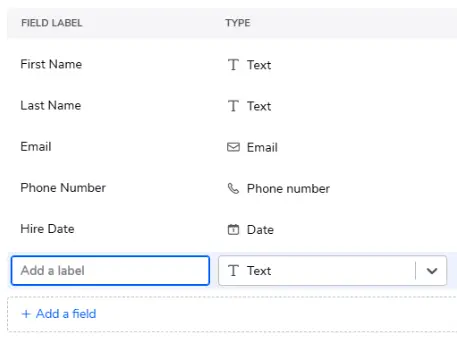
6. After entering the field name and type, Quickbase will automatically add a row below, allowing you to enter details for the next field. Repeat this process to add as many fields as needed.
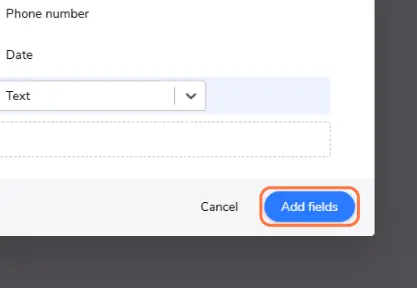
7. When you have added all fields, select the Add Fields button.
Keep Your Quickbase Data Organized with Tables
Tables organize different types of data, fields define specific details for each record, and relationships link tables to avoid data duplication. Following these practices helps you create a Quickbase app that is efficient, scalable, and easy to manage.
- Author: April Barragan
- Date Submitted: 12/17/2024

Resources


© 2026 Quandary Consulting Group. All Rights Reserved.
Privacy Policy