
Knowledge Base
Articles In This Section
How to Build a Mini App with Pipefy AutomationSections
Mastering Pipefy Interfaces: A Comprehensive How-To Guide | BEGINNER
The Interface feature in Pipefy is a powerful tool that helps you interact with and manage data. Think of an Interface as Pipefy’s version of a dashboard—a customizable space where you can view, access, and manipulate information all in one place.
While it shares similarities with dashboards in other low/no-code platforms, Pipefy's Interface brings its own unique set of capabilities tailored to streamline workflows and enhance user collaboration.
We'll dive into key insights on how this feature works, explore a practical use case to illustrate its benefits, and guide you through a step-by-step process to help you implement it in your own Pipefy environment.
Overview of Pipefy’s Interface
You can create multiple interfaces tailored to specific roles, with each interface containing its own set of pages. These pages function as tabs, allowing for easy navigation between them.
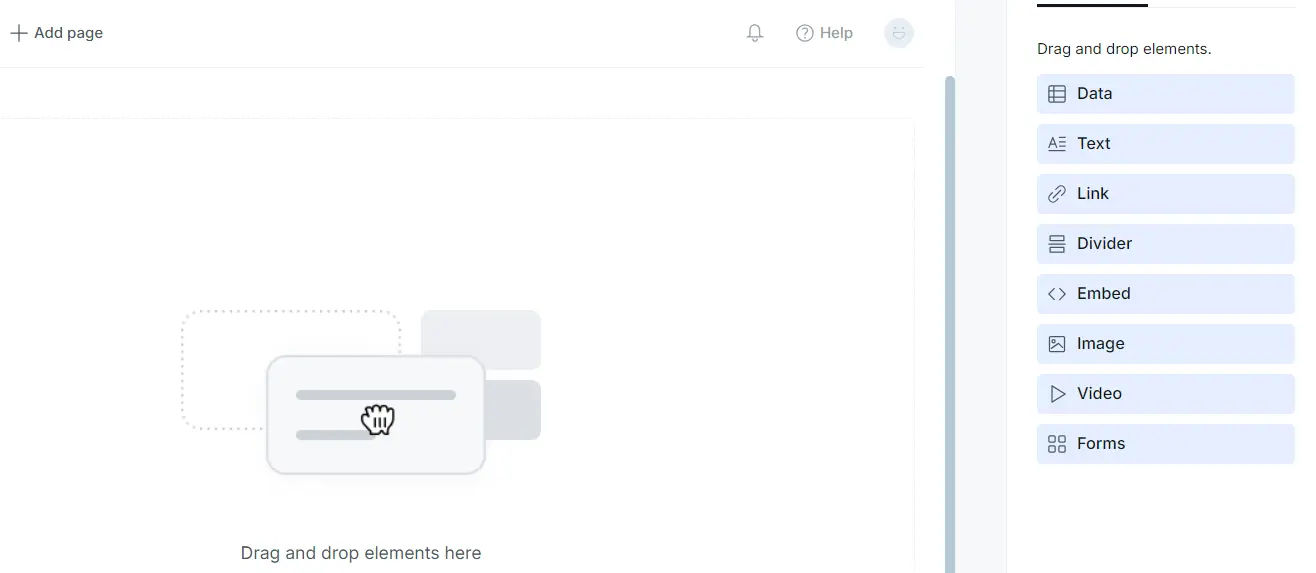
The available elements serve as customizable components. You can drag and drop them into the workspace, allowing you to design your interface to suit your needs.
Getting Started: Use Case Description
In this example use case, we will be using the template process for HR Recruitment. Before getting started, you’ll need to create a free account in Pipefy.
Once you are in, you’ll need to set up your Company. In Pipefy, each realm is called a “Company”.
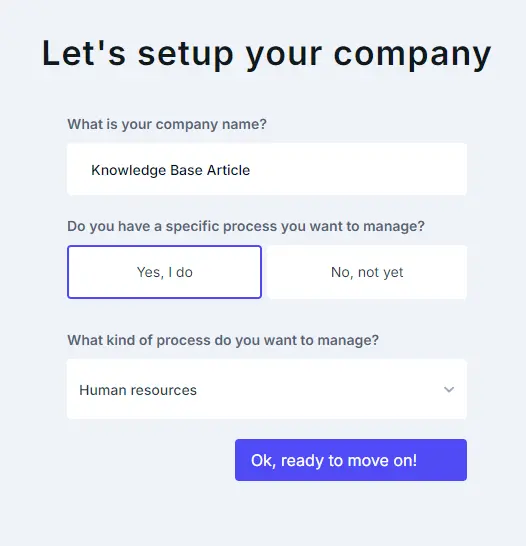
For this tutorial, let’s select Human Resources as the process we want to manage. For your template, select the Human Resources Workflow Processes Pack.

Once you select this, the platform will direct you to the first pipe. You can return Home by clicking the Pipefy logo.
Let’s create an interface that allows the user to access all candidates who have been qualified and have accepted the job and complete the onboarding for that candidate, all in one place!
Without the interface, the user must search the [HR] Recruitment pipe for applicable candidates and then navigate to the onboarding pipe to onboard the candidate.
Steps to Implement Interfaces
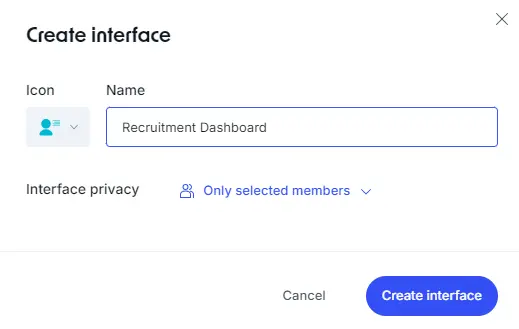
Step 1: To begin, navigate to Interfaces in the top menu bar.

Step 2: Create a new Interface. Name it “Recruitment Dashboard” or something along those lines.
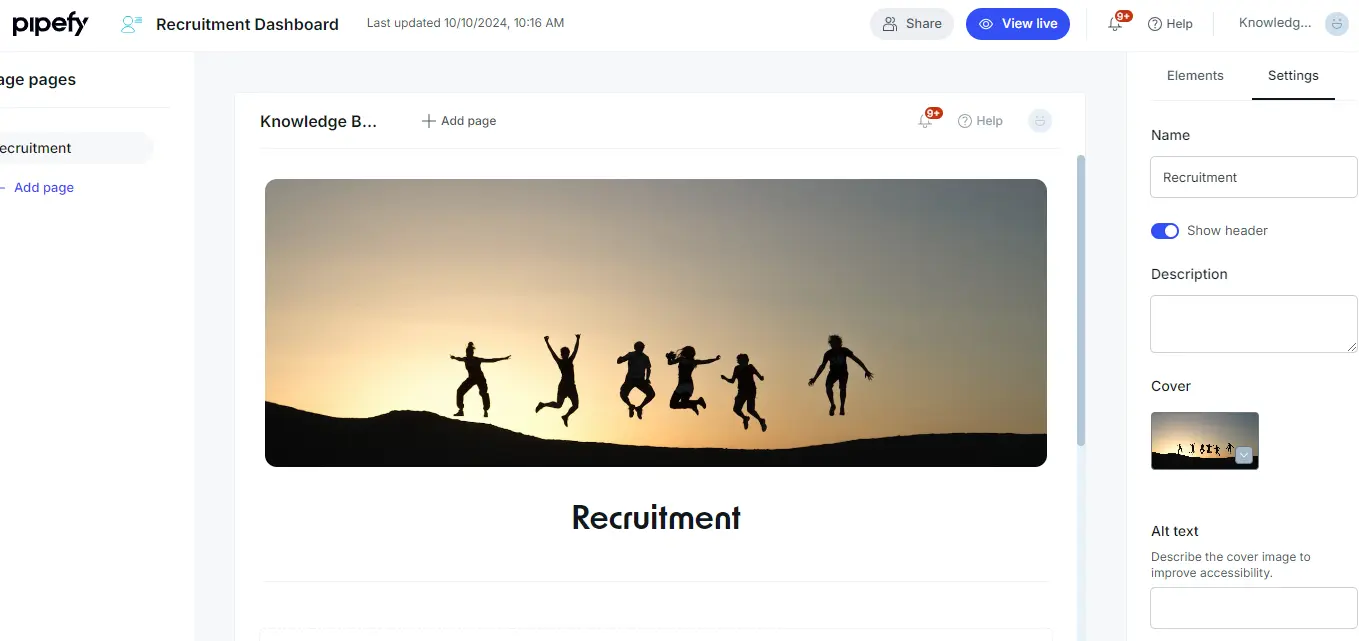
Step 3: Go to Settings to name the first page and create the header. You have the option to show or hide the header. The header displays the page title, description, and cover photo.
Step 4: Return to the Elements tab to add to your interface. With the header, we have the title and a divider already in place. Let’s display some data! Drag the Data element to the workspace and adjust sizing.
Step 5: For this interface, you want to display data from the Recruiting pipe. Select the [HR] Recruitment pipe.
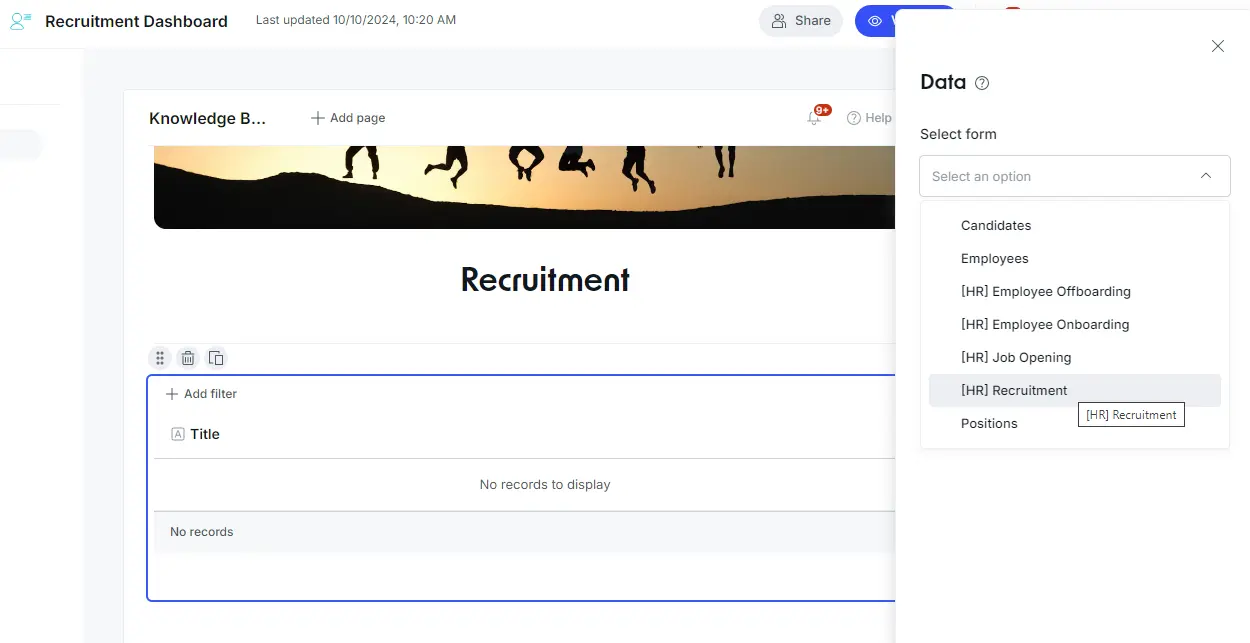
Step 6: The data element displays a table on the interface. You can customize the data by actions, records, and fields.
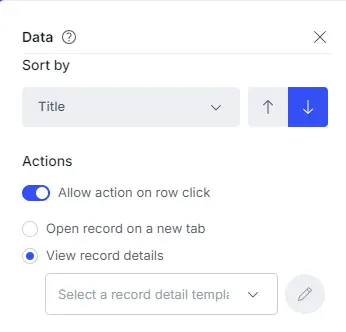
Let’s start with actions.
If you turn the actions off, you will not be able to click into any individual records. With actions on, we have the option of opening the record in a new tab or viewing it within the interface.
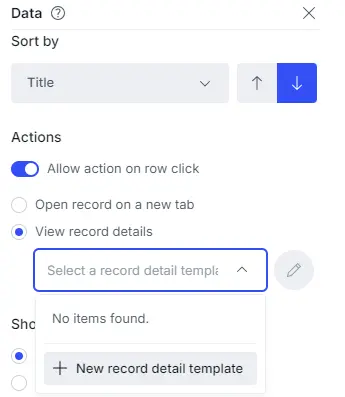
When we select the option to view record details, we then customize the record view. Select the option to view record details, then in the dropdown, select +New record detail template.
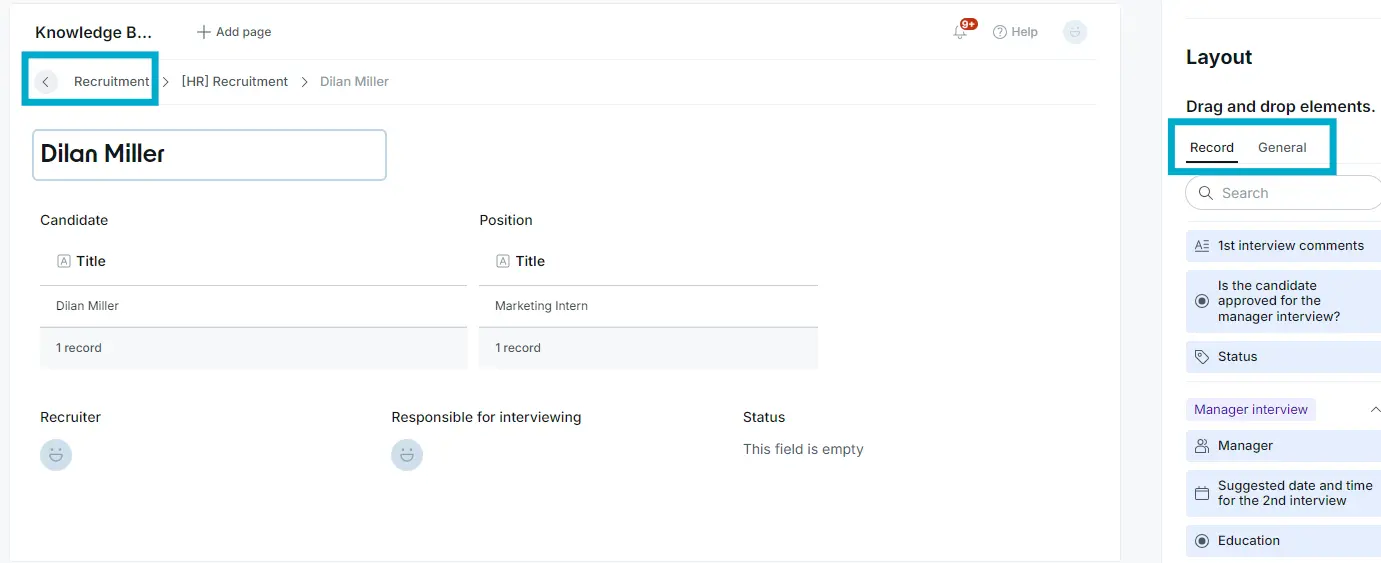
Step 7: The record detail template is the layout of the record details when a user clicks on a record on the table. You can completely customize how you display and organize these fields.
You also have the option to add any of the elements to your record view as well by clicking on the General tab.
Let’s put a few fields on the template and head back to our Interface to customize our data table further. Once you have created the perfect layout, click on the arrow next to Recruitment to return to your Interface.
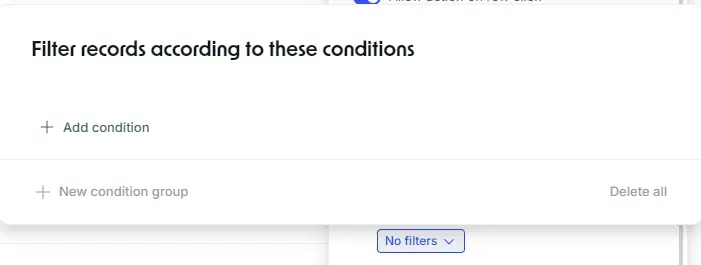
Step 8: Click on the data table to continue editing. Now that you have your layout, let’s customize which records you will display on your table. The options are to show all records or to filter records.
Let’s filter your records. Select the filter option, then open the dropdown to create your filter.
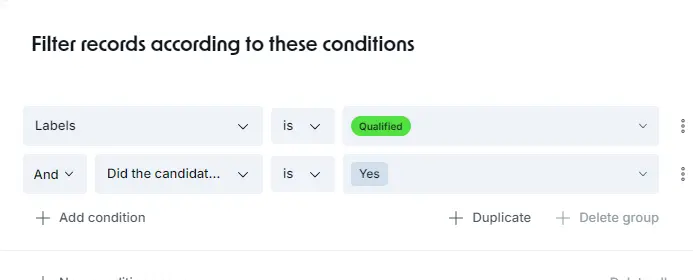
Step 9: For this use case, you want to see all candidates ready for onboarding. Let’s create a condition where the Label is “Qualified” and the candidate accepted the job.
Step 10: Once you have your filter, you can allow users to use filters on the data table. Let’s leave this on.
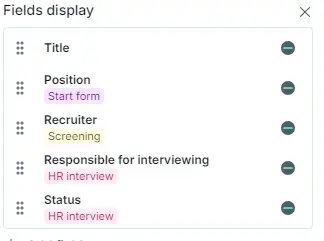
The options for filtering on the table depend on the displayed fields. Let’s add some fields to your table. Click +Add field and select fields. For this use case, let’s display the position, recruiter, the assignee responsible for interviewing, and the status label.
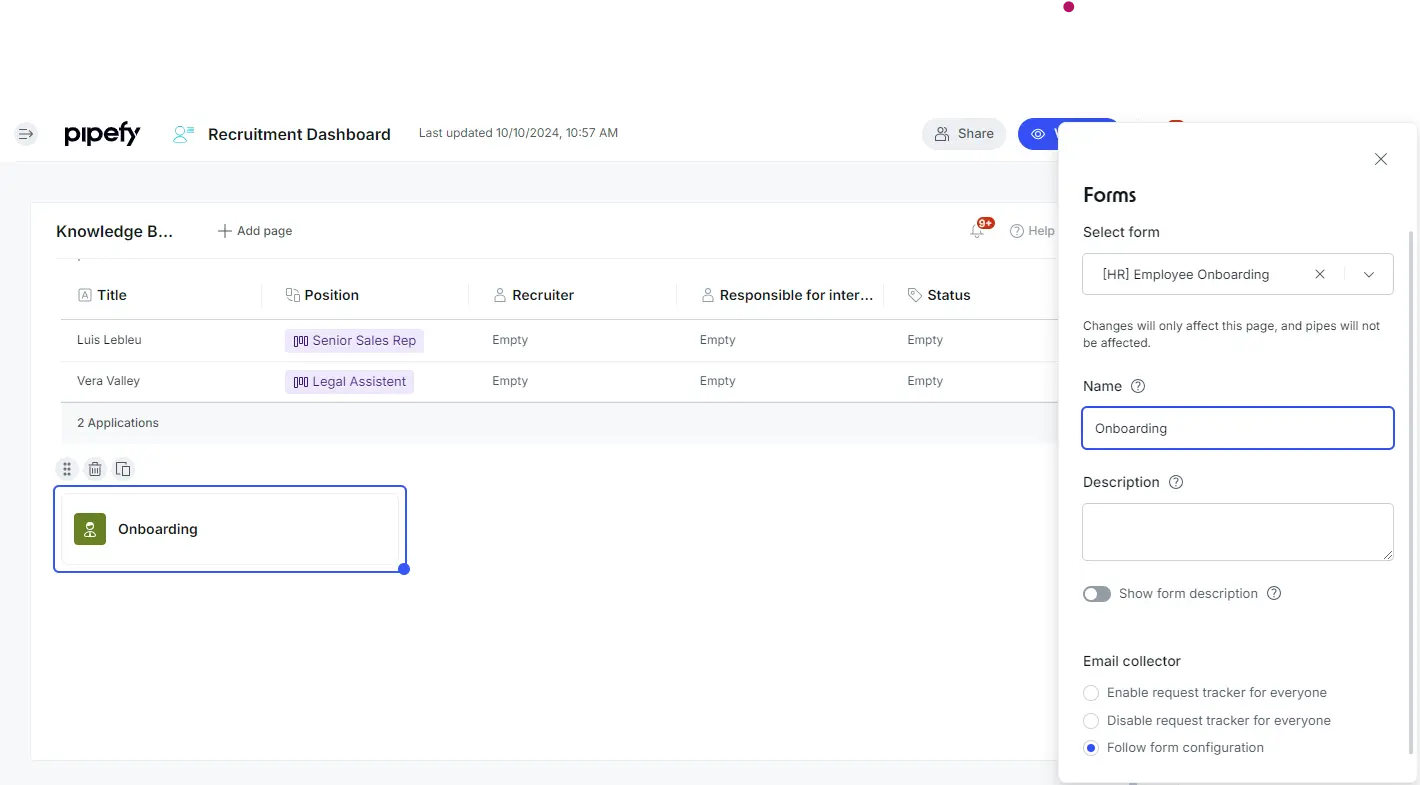
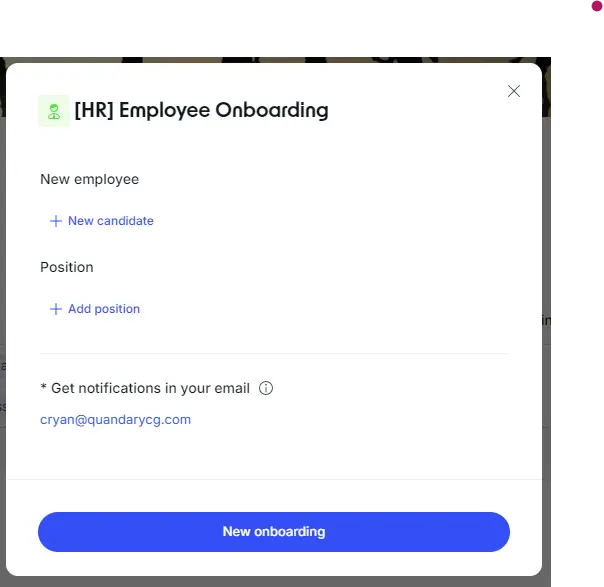
Step 11: Let’s add a form beneath your data table. Adding a form embeds a start form from the selected pipe. In this use case, let’s add the [HR] Onboarding start form.
Step 12: Add in any more elements you would like to your interface! In the Elements tab, drag and drop elements like Text, Links, Dividers, Images, Embed, or Forms.
- Text Element: Add descriptions, instructions, or headers within the interface.
- Link Element: Embed clickable links to external resources like websites or documents.
- Divider: Visually separate different sections of the interface.
- Image: Embed images such as logos or visual aids.
- Video: Add video content for training or guidance.
- Embed: Insert external content, like web pages or interactive tools, using URLs.
- Form: Embed a Pipefy form directly, such as an HR onboarding form.
Step 13: Once you are ready, click View Live to test out your new interface.

Step 14: Click into a record to view your record detail layout. Return to the interface by clicking the arrow next to Recruitment.
Step 15: Click on your form to view the user experience. With the new interface, a user can quickly see which candidates are ready for onboarding and then complete the [HR] Onboarding form to Onboard the candidate.
Conclusion
Pipefy’s Interface feature empowers users to tailor their experience and streamline processes within the platform. In this tutorial, we developed an interface that optimizes the workflow of onboarding candidates from recruitment. With various templates at your disposal, you can easily create interfaces for any workflow.
Dive in and explore the possibilities—customizing your Pipefy environment has never been easier!
- Author: Claire Ryan
- Email: cryan@quandarycg.com
- Date Submitted: 10/22/2024

Resources


© 2026 Quandary Consulting Group. All Rights Reserved.
Privacy Policy