
Knowledge Base
Many-to-Many Relationships in Quickbase | INTERMEDIATE
Topics:
✓ What is a Many-to-Many Relationship?
✓ How to set up a correct Many-to-Many Relationship Structure.
✓ How to create a Many-to-Many Relationship with a Join Table.
✓ How to use a Many-to-Many Relationship.
✓ How to create multiple records from the Join Table.
What Is a Many-to-Many Relationship in Quickbase?
A Many-to-Many Relationship is a relational structure comprised of two separate one-to-many relationships connected by a Join Table (Intermediate table) that allows two tables to act as though they are both master and details tables, allowing records from either table to be a parent to the other table’s records.
In theory, students can have many classes, and classes can have many students. There is a correct and incorrect way of creating this relationship. The upcoming examples will illustrate both methods:
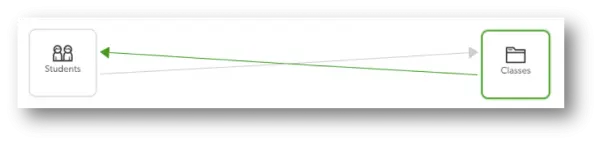
Incorrect Many-to-Many Method
In this example, you can see that both students and classes are related to one another and represent information passing to each other similar to how cars move on a two-lane highway.
Ultimately, this method is not ideal and creates duplication of work in Quickbase.
Correct Many-to-Many Method
In this example, we have created a Join Table. It’s a third table that helps connect data from the two tables you are trying to connect.
To help further illustrate, our students and classes table both contain lists of information.
The join table allows us to take the information from both the students and classes tables and create every combination of classes to students or students to classes with that information.
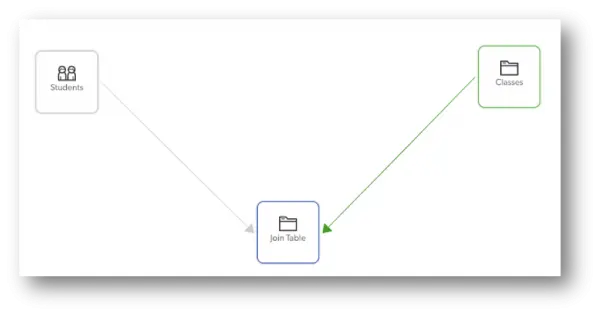
For example, our join table for students and classes could be called “Registrations” or “Assignments.”
How to Create a Many-to-Many Relationship
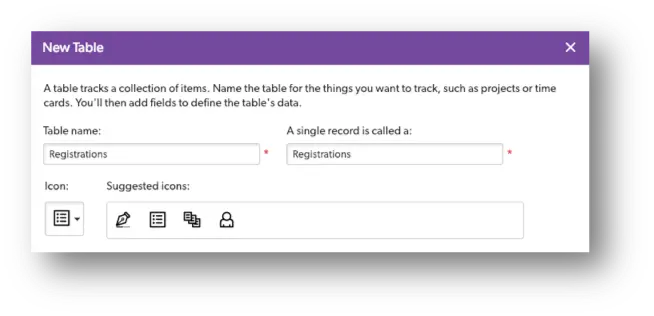
- Create a new table to serve as the join table.
- You will want to add a new table to your application and provide an appropriate name.
- Create a relationship between the new table and the existing tables.
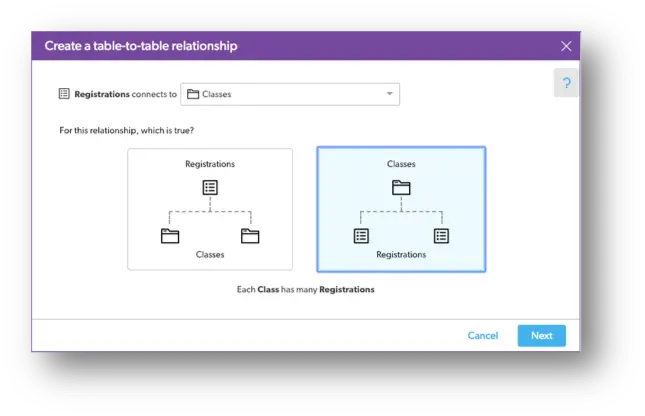
In our example, we created a One-to-Many Relationship between Classes and Registrations (above) and a One-to-Many Relationship between Students and Registrations (below).

- Add lookup fields to the relationship.
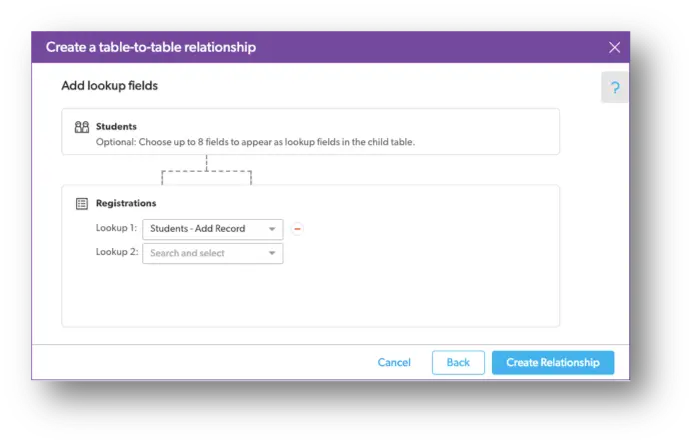
For example, a class field in the students table that you’ll no longer use. By removing these fields, you will avoid duplicate information.
Using the Many-to-Many Relationship
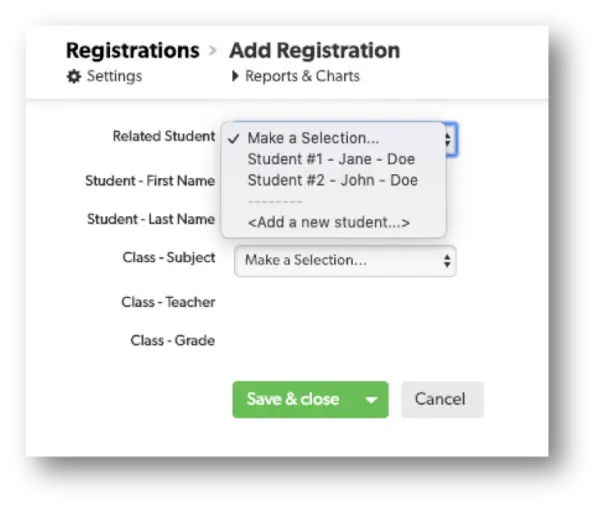
1. Once you establish your join table and have both related tables connected, you can add information through the newly created join table. For example, if you want to register a new student into a class, you would add a new record to the Registration table.

2. Continuing with our example, within the new record, you would select the student and select the class. Finally, save & close.
How to Create Multiple Records in the Join Table
Quickbase makes this easy by adding a URL Formula Button to each parent table.
From within a student record, you can click the Add Registration button to assign a person a subject, teacher, and grade.
You can do the same from within a class record too. The URL button adds a new record to the Registration table that joins a student and a class.
- Author: Alex Skudrovskis
- Email: askudrovskis@quandarycg.com)
- Date Submitted: 2/5/2019

Resources


© 2026 Quandary Consulting Group. All Rights Reserved.
Privacy Policy