
Knowledge Base
How to Set Up Reminders in Quickbase | BEGINNER
Reminders in Quickbase allow you and other registered Quickbase users in your realm to receive messages in your emails about dates, which can be filtered by various conditions.
The possibilities of reminders are endless. For example, you can use reminders to inform your team about an approaching event or ensure a new hire completes their onboarding steps on time. You can even let a project lead know that their task is overdue with reminders.
Why Use Quickbase Reminders?
A reminder is an emailed message from Quickbase. While initially set based on dates, you can also set them up with various conditions, such as statuses or specific users. Reminders send a report of all records that fit the set criteria.
The benefits of using reminders are task tracking and accountability. You can send them out if you don’t want a team member (or yourself) to forget something important. On the other hand, you should not use reminders if the date or span of time for an event is not important.
You can only create and edit reminders if you have full admin access. And you can only send them out to registered Quickbase users.
How to Create a Reminder in Quickbase
You can create an automatically emailed Quickbase reminder to your specifications in 9 steps.
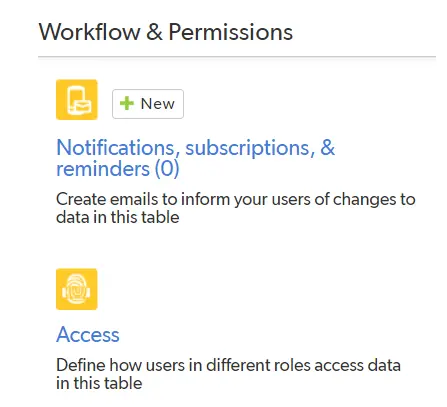
Step 1: Select the table from the table bar that contains the date field you want to use for the reminder. Click Settings. Then, click + next to Notifications, subscriptions, & reminders.
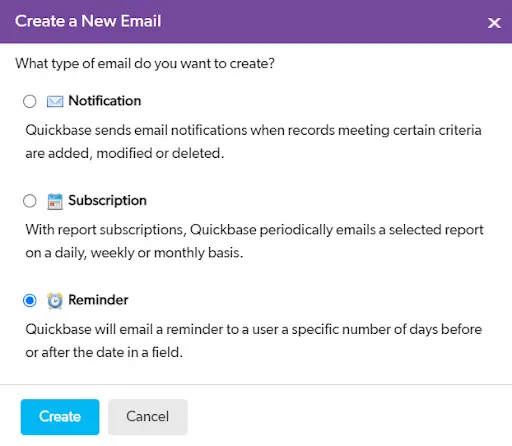
Step 2: Select Reminder, then click Create.
Step 3: In the Reminder Name text box, enter a name for the reminder.

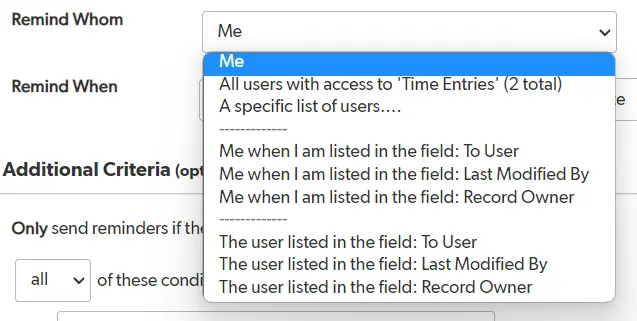
Step 4: Select recipients from the Remind Whom list:
- Me: Send the reminder only to you.
- All users with access to <table name>: Sends the reminder to all users with access to the table.
- A specific list of users: Sends the reminder to a specific set of users or groups.
- Type the email addresses, user names, or group names of registered Quickbase users.
- Separate the entries using a semicolon, comma, or by entering each user/group on a separate line.
- Click the “Browse Users” button to select users with the ”User Picker”.
- Email addresses are pasted into the field as text. If the email address changes, you must update the reminder manually.
- Me when I am listed in the field <name>: Quickbase lists this choice for each user field in the table. If you want Quickbase to send the reminder to you only when you are the user listed in a specific user field, select this option where the field name is the one you want.
- The user listed in the field name: Sends the reminder to all users listed in a particular user or list-user field. For example, you can let team members know their assigned tasks have changed (or whatever record change or changes you choose in the next step). To do so, select the option for the assigned field.
Note: Reminders can only be sent to registered Quickbase users.
Step 5: On the Remind When line, use the following options to set up when you want to send the reminder:
- Enter the number of days before or after the date that Quickbase will send the reminder.
- Select Before or After from the list to the right of Days.
- Select the field you based the reminder on from the date in the field list. For example, Finish Date or Start Date.

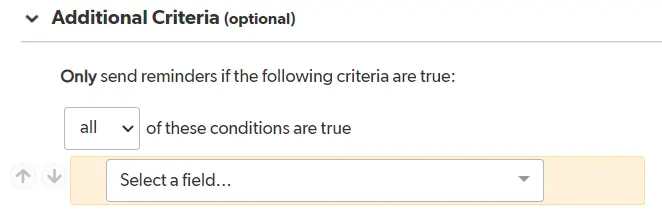
Step 6: Optionally, under Additional Criteria, set up a filter to specify conditions that send a reminder.
For example, you may want to specify that Quickbase sends a reminder if the status is ”Incomplete”.
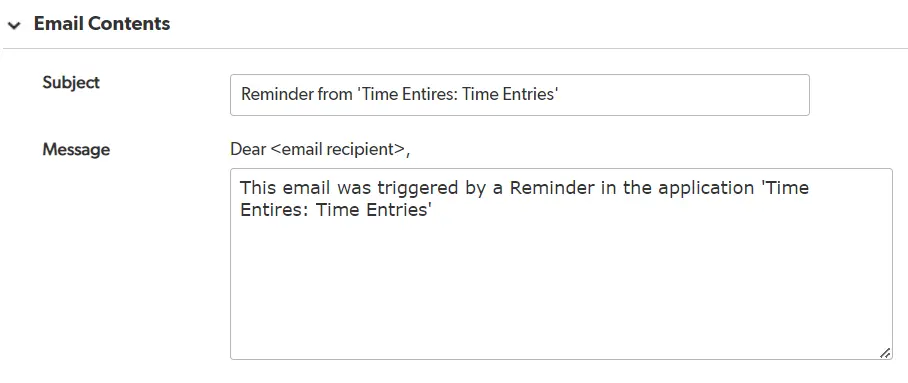
Step 7: Optionally, type your Subject and Message to customize the email. If you like the text that Quickbase provides, make no changes.
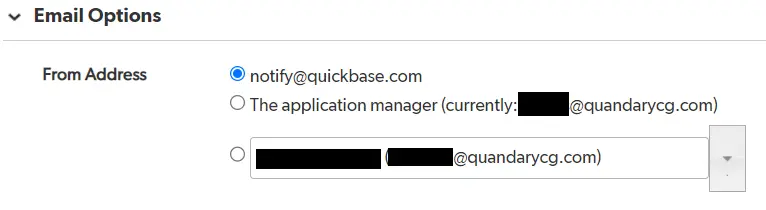
Step 8: Under Email Options, choose the email address you will send the reminder from:
- notify@quickbase.com
- The application manager (your email address)
Step 9: Click Preview on the Page bar to view the email before you save it, then click Save.

Note: The reminder email includes the default report for the table. You may want to ensure the settings for the default report are suitable for those receiving the reminders.
- Author: Christin Shelton
- Email: cshelton@quandarycg.com
- Date Submitted: 9/1/2024

Resources


© 2026 Quandary Consulting Group. All Rights Reserved.
Privacy Policy