
Knowledge Base
Articles In This Section
How to Create Multiple Records in a Quickbase Join Table How to Change Your Primary Key from Record ID# in QuickbaseHow to do a Table-to-Table Import in QuickbaseHow to Create Tables, Fields, and Records in Quickbase How to Set Up Reverse Relationship in QuickbaseSections
How to Import Data into Quickbase
You’ve just created an amazing application, and now all of your table data is sitting somewhere outside of Quickbase.
You just can’t wait to click + New Record a couple hundred times and tediously enter similar field information over and over.
Fortunately, Quickbase offers an Import feature that allows for mass creation and updating of fields and records to save you time and get your application loaded with data and ready for your users.
Use Cases for Importing Data into Quickbase
Import functionality can save you time and headache in a variety of ways:
- Bulk upload of new records.
- Bulk update of existing records.
- Bulk field creation
- Multiple ways to import data.
How to Navigate to the Import/Export page in Quickbase?
Before we can do anything, we need to get to the correct page and explore the available options.
- From any table home page (though you’ll save a step by being on the table you’d like to import to), navigate to the right side of the table bar
- Click More ▾ and select Import/Export from the dropdown list.
- The Import/Export/Copy page provides six options.
This article will focus on importing into a table using a file or the clipboard.

How to Import New Data from a File (or the Clipboard) in Quickbase?
- Select the “Import into a table from a file” action to expand your import options.
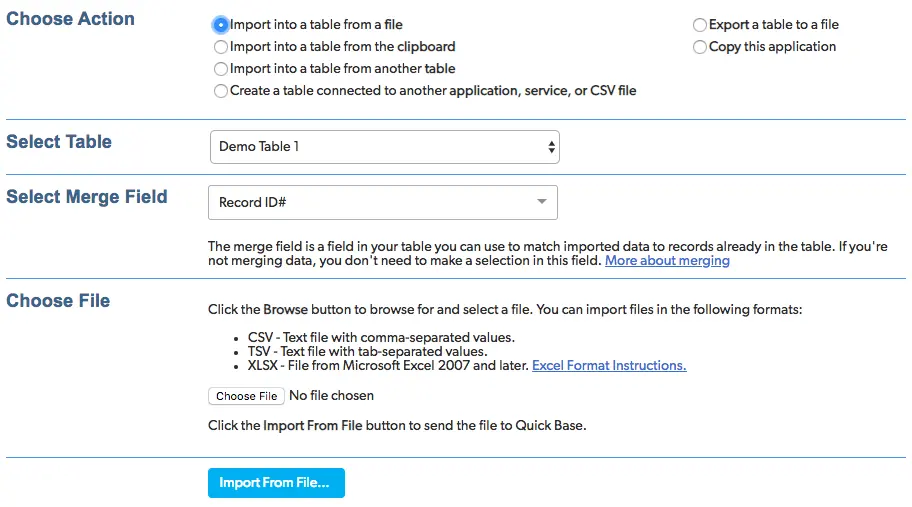
- Select the Table you would like to import into. This will default to the table you were previously on.
- Select the Merge Field.
- This is used to update existing records and will be either Record ID# or another field with a unique value.
- To upload your data, click Choose File to load your data, then click Import From File… to continue.
- Now it’s time to finalize your import. To make things easy on myself, I typically include Field Names at the top of each column.
- This lets Quickbase intuitively determine how your data will be mapped. You can always change these using the dropdown options.
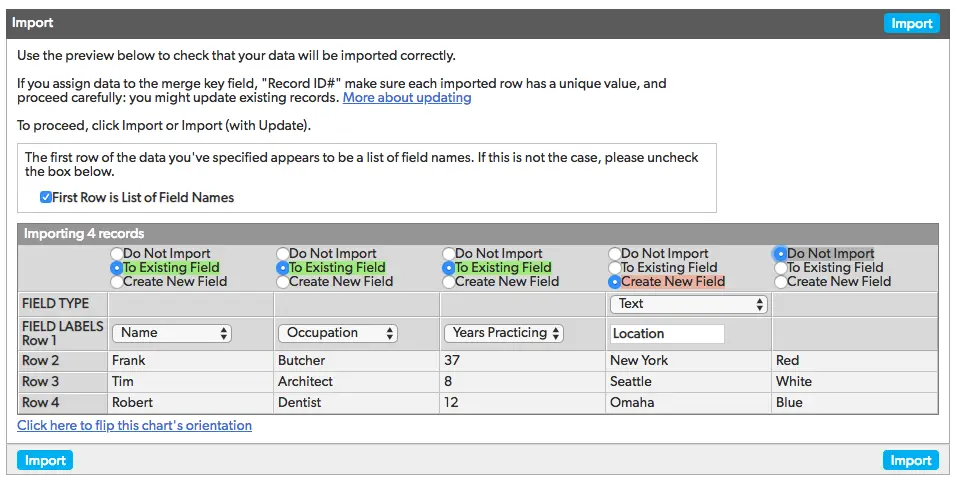
- Once you’ve finalized your options, click Import. A small table will appear on the next window with the output of everything that just occurred.
- In our case, we’ve created three new records and one new field.

How to Update Data from a File (or the Clipboard) in Quickbase?
This scenario is almost identical to importing new records, but with one caveat…you’ll need to have the key field value of all records that you wish to update.
I’ve found it easiest to export a table report that is ordered identically to the data you wish to update and includes the key field of each record.
- After adding the appropriate key field values to the data you wish to update and importing the file, you will be taken to the same finalization page.
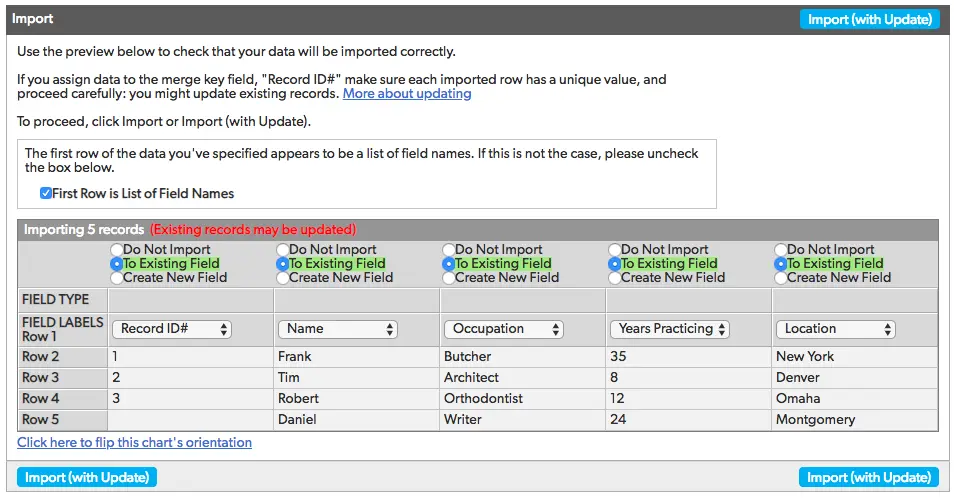
- In the image above, we’re updating the records that we previously imported and also adding a fourth record. You may choose to assign it a Record ID# but use caution as you may overwrite another record.
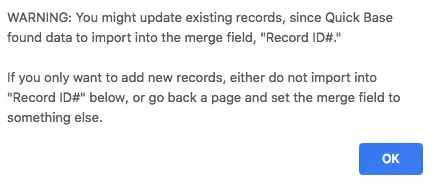
- We’ll leave it blank - A message will appear letting you know that your import may be updating existing records (which is exactly what we want to do).
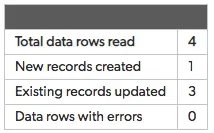
- Click Import (with Update) to upload your records to Quickbase. On the next screen you’ll see that we’ve created one new record and updated our three existing records from the previous import.
How to Use Import to Create Fields in Quickbase?
Using the standard + New Fields option, you can add up to twelve fields at a time. This sounds great until you’ve got a table that requires 400 fields.
Thankfully we can just import them! We’re going to assume you’ve read the above examples and jump straight to the point.
- Create a file with a single line of all the fields you want to create, then import it.
- In the finalization screen, select Create New Field for every column.
- Field Labels populate automatically from your file, but you can still change them if you’d like.
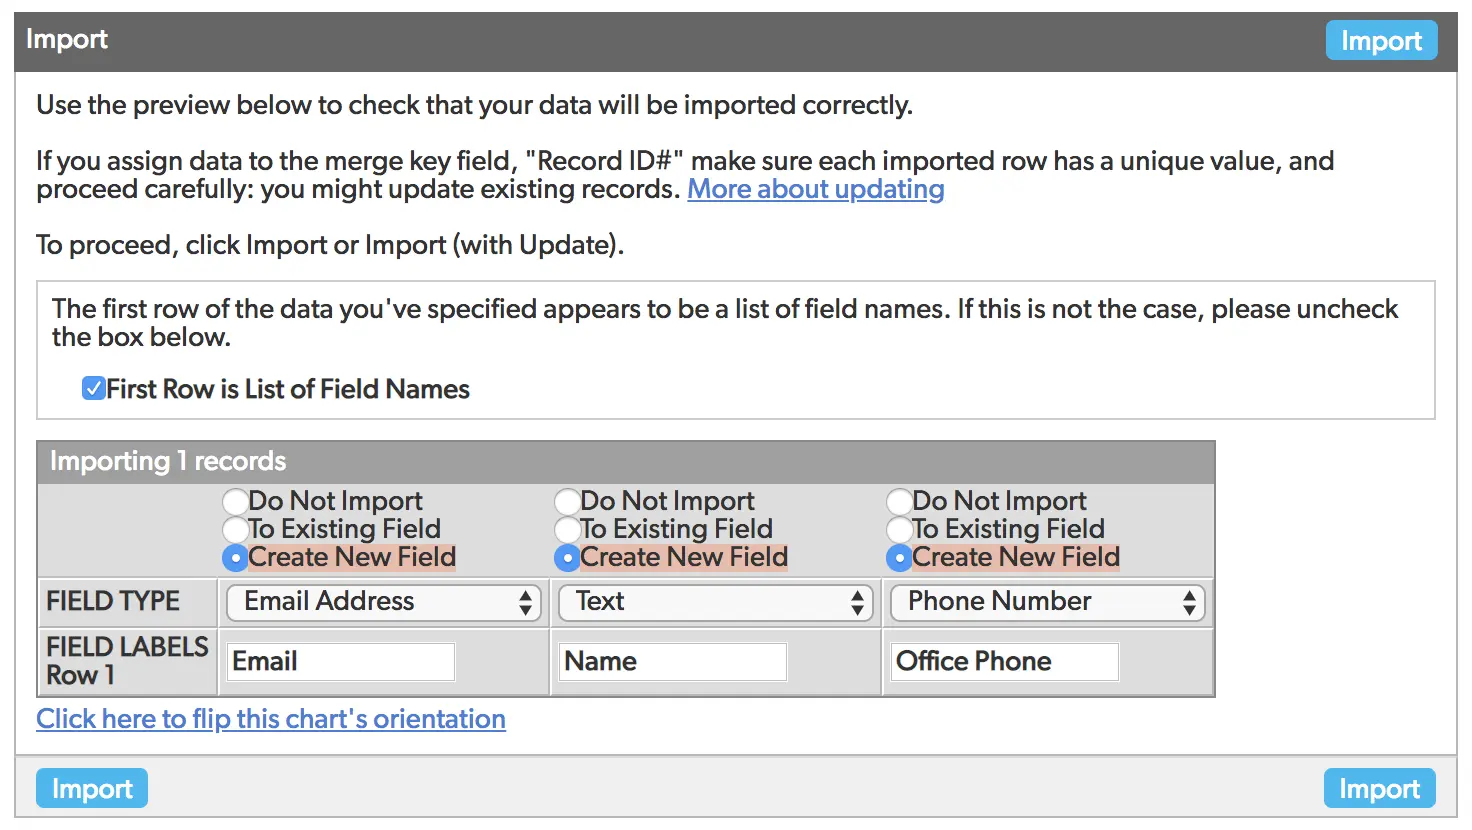
- Click Import and bask in the glory of Quickbase efficiency!
- Author: John Orsak
- Title: Senior Solution Consultant | Quickbase
- Email: jorsak@quandarycg.com
- Date updated: April 1, 2026
Top 10 FAQs About Importing Data into Quickbase
1. How Do I Import Data Into Quickbase?
Importing data into Quickbase is simple and can be done using CSV, Excel, Google Sheets, or integrations from other platforms.
To begin:
- Open your Quickbase app
- Select the table where you want the data imported
- Click Import/Export
- Upload your file
- Match fields correctly
- Run the import
Quickbase automatically detects column headers and helps map fields for cleaner imports.
2. What File Types Can Quickbase Import?
Quickbase supports multiple file formats, including:
- CSV (.csv)
- Excel (.xlsx, .xls)
- TSV files
- Google Sheets (via integrations)
- API imports from third-party systems
- CSV files are typically the fastest and most reliable method for bulk data imports.
3. Why Is My Quickbase Import Failing?
Common reasons Quickbase imports fail include:
- Incorrect field mapping
- Duplicate key fields
- Invalid date formatting
- Required fields left blank
- Unsupported file formatting
- Character limit violations
Before importing, clean your data and validate formatting consistency.
4. How Do I Map Fields During a Quickbase Import?
Field mapping tells Quickbase where imported data should go. For example:
- CSV ColumnQuickbase
- FieldCustomer
- NameClient
- NameEmail
- AddressContact
- EmailProject
- IDProject Number
Quickbase allows manual mapping or automatic matching based on field names.
- Best practice: Always verify field types before importing to avoid broken relationships or formatting issues.
5. Can I Import Related Records Into Quickbase?
Yes. Quickbase supports relational database imports. You can import:
- Parent-child relationships
- Reference tables
- Linked records
- One-to-many datasets
To do this correctly, use unique identifiers such as Record IDs or Key Fields. A great example of this is:
- A construction company importing projects and subcontractors into Quickbase can connect tables using Project IDs.
6. How Can I Automatically Import Data Into Quickbase?
Automatic imports can be achieved using:
- Quickbase Pipelines
- APIs
- Zapier
- Workato
- Make.com
- ETL tools (like, Prefect.io)
- Scheduled CSV imports
Automated imports reduce manual entry and improve operational efficiency. Businesses frequently automate imports from:
7. What Is the Best Way to Clean Data Before Importing Into Quickbase?
Before importing:
- Remove duplicate rows
- Standardize date formats
- Eliminate blank records
- Validate email addresses
- Ensure consistent naming conventions
- Check for invalid characters
Clean data improves reporting accuracy and automation reliability.
Many Quickbase consultants recommend using Excel Power Query or data-cleaning tools before large imports.
8. Can Quickbase Import Large Data Sets?
Yes, Quickbase can handle large imports, but performance depends on:
- Number of records
- Field complexity
- Relationships
- Attachments
- Formula fields
For very large datasets:
- Break imports into batches
- Use CSV instead of Excel
- Import during off-peak hours
- Disable unnecessary automations temporarily
Enterprise organizations often use APIs for high-volume Quickbase data migrations.
9. How Do I Import Data Into Quickbase Without Creating Duplicates?
To prevent duplicates:
- Use a unique key field
- Enable merge/update options
- Validate existing records
- Use Record IDs when updating
Quickbase allows you to:
- Add new records
- Update existing records
- Merge imports intelligently
This is especially important for CRM, inventory, and project management applications.
10. Should I Use Quickbase APIs or Manual Imports?
It depends on your use case. Manual imports are ideal for:
- One-time uploads
- Small datasets
- Non-technical users
API imports are better for:
- Real-time syncing
- Enterprise integrations
- Automated workflows
- High-volume data operations
Organizations scaling Quickbase across multiple departments often move toward API-driven integrations for long-term efficiency.
Final Thoughts
Importing data into Quickbase can dramatically improve operational visibility, reporting, and workflow automation when done correctly. Whether you're uploading Excel spreadsheets, syncing CRMs, or automating enterprise data pipelines, following Quickbase import best practices helps reduce errors and improve scalability.
If your organization needs help with Quickbase data migration, integrations, or workflow automation, reach out to Quandary Consulting Group for a free discovery call!

Industries
Resources


© 2026 Quandary Consulting Group. All Rights Reserved.
Privacy Policy