
Knowledge Base
Articles In This Section
How to Create Multiple Records in a Quickbase Join Table How to Change Your Primary Key from Record ID# in QuickbaseHow to Import Data Sets into QuickbaseHow to do a Table-to-Table Import in QuickbaseHow to Set Up Reverse Relationship in QuickbaseSections
How to Create a Table, Field, and a Record in Quickbase
In Quickbase, a database record is a collection of data points related to a specific entity (person, place, or thing). A database record is similar to a row in a spreadsheet.
- Each record (row) can contain multiple fields (or columns), which hold individual pieces of data that define the entry.
For example, in a customer database, a record might include fields for the customer’s name, address, phone number, and email. Fields are sometimes called attributes, which function the way adjectives do in grammar (modifying the record).
A table is a structured collection of database records.
We create tables to group similar records together. For example, a table called “Customers” will contain customer records. Most databases contain multiple tables, each containing a specific type of record and the fields that define it.
From a developer's perspective, you create a record to define a collection of database fields to collect and store data. From an end-user perspective, any time you add data to a database, a record gets added or modified.
How to Add Table in Quickbase
The following steps outline one of several methods of creating a table within Quickbase. The method described here uses the current Quickbase UI with Side Navigation enabled.
- If you don’t have Side Navigation enabled, this is how you can do that:
- Create a new application or open the application that will host the new table.
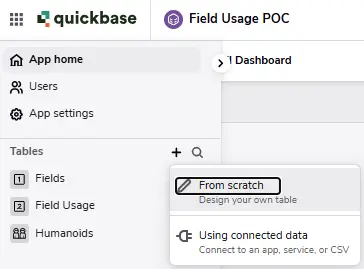
- Move the mouse to the left of the screen to expand the navigation pane, and then click the + symbol adjacent to tables, as shown below.
- Select From Scratch in the context menu. (This article does not cover creating tables with connected data)
- Use the fields in the displayed pop-up window to configure the table settings.
- Table Name
- Icon shown in the application navigation menu
- Single record (record name or type)
- Description of the records in the table or its basic purpose
- Click the Create Table button when you are ready to save the table settings.

- When you click the “Create Table” button, the browser will automatically navigate to the fields list for the new table. You may begin adding fields now. Or click “Cancel” to do it at a later date.
How to Add Fields to a Table in Quickbase
The following steps outline one of several methods of creating fields within Quickbase. The method described here uses the current Quickbase UI with Side Navigation enabled.
- Move the mouse to the left of the screen to expand the navigation, as shown below.
- Hover the mouse over the name of the table where you want to add the fields.
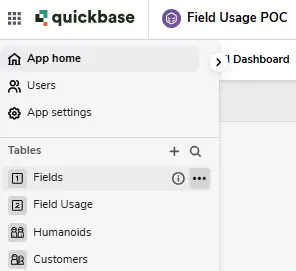
- Click the menu icon to access the Fields’ table settings context menu.
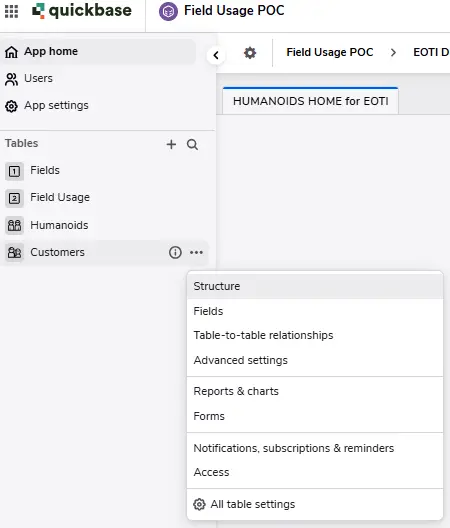
- Select Fields in the context menu. You’ll see the Table field settings page, as shown below.
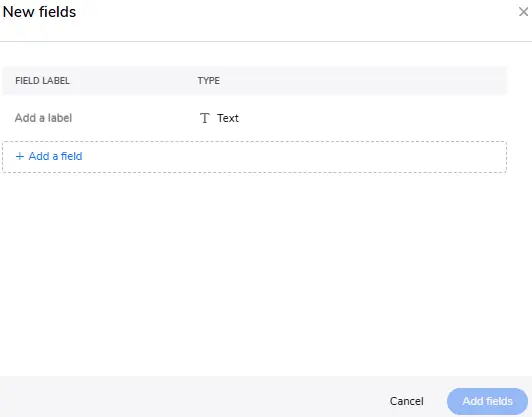
- Click the New Fields button in the upper right corner of the page.

- Type in the field name and select a field type, as shown below. Repeat this process to add multiple fields.
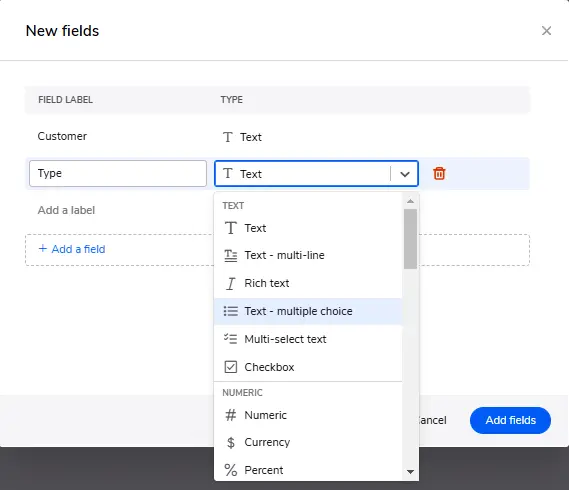
- Click the Add fields button when you have finished entering fields.
- When you add a “Text – multiple choice” or “Multi-select text” field type, you will need to enter the choices for each one.
- Type or paste the choices as shown below.
- Use the radio button to select the sorting option for the choices
- Use the checkbox to Allow or Deny users the ability to create new choices.
- Click the Next button to apply the configuration.

- Click Exit Settings to return to the Table Homepage when finished.
- After you have added fields to the table, users may begin adding records.
How to Add Records to the Database in Quickbase
The following steps outline one of several methods of creating records within Quickbase. The method described here uses the current Quickbase UI with Side Navigation enabled.
- Move the mouse to the left of the screen to expand the navigation as shown below.
- Click the name of the table where you want to add the records.
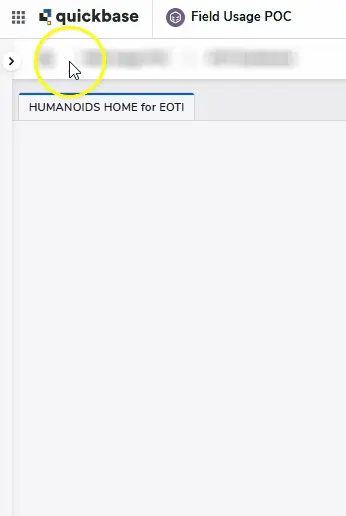
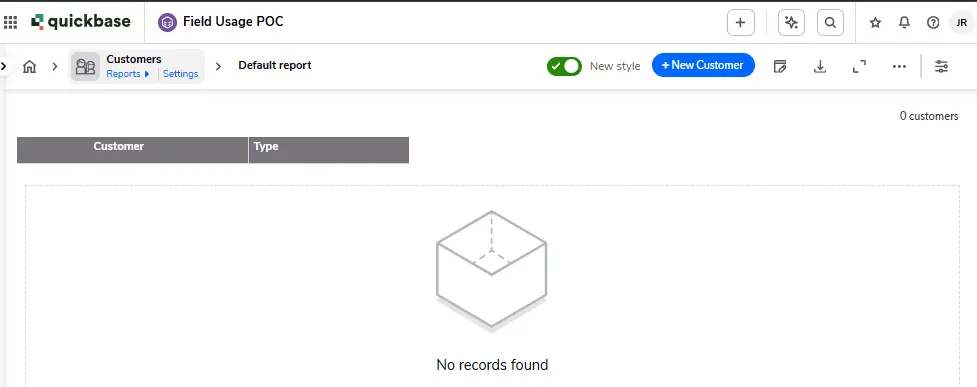
The browser will navigate to the selected table’s home page. In a new application or table, the homepage will display an empty report similar to the following screenshot.
The button to add a record to the table will be on the upper right corner of the page.
You’ll see the type of record you’re creating on the button label. In our example below, it’s “New Customer”.
- Click the New Record button to open the add record form for the table.
- Populate the form fields.
- Click the Save button.

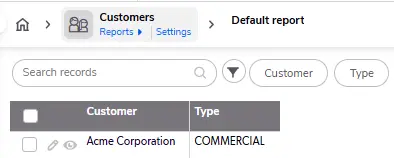
The browser will navigate to the table homepage. The added record will now be in the default report for the table.
Best Tips for Creating Records in Quickbase
Model your data so that records contain relevant/similar data. For example, an employee record should not include supply chain data.
Normalize your data and keep redundancy to a minimum.
Use specified field types to improve data accuracy, consistency, and portability. For example, if you need a number value, use a number-type data field on the record instead of using the default text field.
- Use a multi-choice text field instead of a free-form text field to normalize the values from record to record.
Consider building conditions and rules into records to ensure data integrity and desired user behavior within the application.
Always consider the type of reports and queries you need when creating records. Model records in a way that will make reporting easy and straightforward.
- Author: Jeff Richey
- Title: Solution Consultant | Quickbase
- Email: jrichey@quandarycg.com
- Date Published: April 15, 2026
Top 10 FAQs About Creating Tables, Fields, and Records in Quickbase
1. What is the difference between a table, a field, and a record in Quickbase?
- A table is where related information is stored within a Quickbase application. Think of it like a spreadsheet tab or database table.
- A field is an individual piece of information within a table, such as Customer Name, Project Status, Due Date, or Budget.
- A record is a single entry in a table. For example, if you have a Customers table, each customer represents one record containing information stored across multiple fields.
Together, tables, fields, and records form the foundation of every Quickbase application.
2. How do I create a new table in Quickbase?
Creating a table in Quickbase is simple.
- Open your Quickbase application.
- Select Settings.
- Navigate to Tables.
- Click New Table.
- Give the table a descriptive name.
- Choose whether to create the table from scratch, import existing data, or copy another table.
- Save the table.
Each table should represent a single type of information, such as Customers, Projects, Employees, Vendors, or Work Orders.
3. How do I add new fields to a Quickbase table?
To create a new field:
- Open the desired table.
- Go to Settings.
- Select Fields.
- Click New Field.
- Choose the appropriate field type.
- Give the field a meaningful name.
- Configure permissions, default values, formulas, or validation rules.
- Save your changes.
- Adding well-designed fields makes applications easier to use and improves reporting accuracy.
4. What field types are available in Quickbase?
Quickbase offers many field types designed for different kinds of data, including:
- Text
- Numeric
- Currency
- Checkbox
- Date
- Date/Time
- Time of Day
- Email Address
- Phone Number
- URL
- Address
- User
- Formula Fields
- Rich Text
- File Attachments
- Lookup Fields
- Summary Fields
- Relationship Fields
Selecting the correct field type improves reporting, automation, filtering, and data validation.
5. How do I create a new record in Quickbase?
There are several ways to create records:
- Click the New Record button manually.
- Import records from Excel or CSV.
- Create records through Quickbase Pipelines.
- Use Quickbase Automations.
- Submit information through Quickbase Forms.
- Use the Quickbase RESTful API.
- Create records from parent-child relationships.
- Generate records using custom buttons.
Each method supports different business processes and automation requirements.
6. What is the best way to organize tables in Quickbase?
Each table should represent one business object. Examples include:
- Customers
- Projects
- Employees
- Work Orders
- Assets
- Vendors
- Invoices
- Purchase Orders
Rather than placing everything into one large table, separate related information into multiple tables connected through relationships. This improves performance, reporting, scalability, and long-term maintenance.
7. How many fields can a Quickbase table have?
Quickbase supports a large number of fields within a table, allowing organizations to capture extensive business information. However, creating unnecessary fields can make applications harder to maintain and slower for users.
Best practices include:
- Only create fields that serve a business purpose.
- Use formulas instead of duplicate data where appropriate.
- Archive unused fields.
- Group related fields logically.
- Follow consistent naming conventions.
A well-designed schema is easier to maintain as applications grow.
8. What are the best practices for naming tables and fields in Quickbase?
Good naming conventions improve usability and make applications easier to maintain. Recommended practices include:
- Use clear, descriptive names.
- Avoid abbreviations when possible.
- Keep names consistent across the application.
- Use singular or plural names consistently.
- Include business terminology users already understand.
- Avoid special characters unless necessary.
For example: Good Table Names
- Customers
- Projects
- Vendors
- Purchase Orders
Good Field Names
- Project Manager
- Customer Email
- Completion Date
- Contract Value
Clear naming conventions also simplify reporting and automation.
9. Can I change or delete tables and fields after they have been created?
Yes. Quickbase allows administrators to:
- Rename tables
- Rename fields
- Modify field types (when supported)
- Add new fields
- Delete unused fields
- Remove entire tables
Before deleting tables or fields, review:
- Reports
- Forms
- Pipelines
- Relationships
- Formula fields
- Dashboards
- Automations
Removing objects that are referenced elsewhere may break application functionality.
10. Should I create multiple tables or keep everything in one table?
In most cases, multiple related tables are the recommended approach.
For example, instead of one large table containing:
- Customer Information
- Project Information
- Invoice Information
- Employee Information
Create separate tables for:
- Customers
- Projects
- Employees
- Invoices
Then connect them using Quickbase relationships.
This normalized structure reduces duplicate data, improves reporting, supports scalable application design, and simplifies future enhancements.
What are the biggest mistakes people make when building Quickbase tables?
Some of the most common mistakes include:
- Putting too much information into a single table.
- Creating duplicate fields that store the same data.
- Choosing incorrect field types.
- Using inconsistent naming conventions.
- Ignoring relationships between tables.
- Failing to validate data entry.
- Creating unnecessary formula fields.
- Not planning for future growth.
- Overlooking user permissions and security roles.
- Building without documenting the application's data structure.
Taking time to properly design your tables, fields, and relationships before entering data will result in a more scalable, efficient, and user-friendly Quickbase application.

Industries
Resources


© 2026 Quandary Consulting Group. All Rights Reserved.
Privacy Policy