
Knowledge Base
Articles In This Section
What Are Quickbase Dashboards How to Set Up Personalized Dashboards in QuickbaseHow to Create a Dashboard in QuickbaseHow to add a Webpage Widget (embedded iFrame) to your Quickbase DashboardHow and When to Use Calculated Columns for Quickbase Reports How to Create a Summary Report in QuickbaseHow to Utilize the Dashboard Side Bar in QuickbaseHow to Build an Operations Dashboard in Quickbase How to Color-Coding Rows for Quickbase Reports How to Create External Stakeholder Forms, Reports, and Dashboards in QuickbaseHow to Update the Default Table and Report Columns in QuickbaseHow to Organize & Assign Groups to Quickbase ReportsHow to Link Dashboards Together in QuickbaseHow to Create Reports and Charts in QuickbaseHow to use Rich Text to Make your Quickbase Dashboard Dynamic Using Report Formulas as a Filter in a Report in QuickbaseHow to Create a Kanban Report in QuickbaseHow to Automate Approval Tracking in QuickbaseHow to Organize and Assign Groups to Quickbase ReportsHow to Use Report Formulas as a Filter in a Quickbase ReportHow to Create Subscription Emails in QuickbaseHow to Create an Audit or Change Logs with Automations How to Create a Pie Chart in QuickbaseHow to Build Standard Reports in QuickbaseHow to Add a Report to your Quickbase DashboardSections
Using Automations to Log Approval Time and User in Quickbase
Background
Quick Base is excellent at creating workflows. In a simple project management workflow – create, review, approve – it is important to track the users who create, review, and approve the project, as well as the times the project is created, reviewed, and approved. When this information is captured, insights can be gleaned to help improve the workflow and cut down on the time it takes to complete projects. Automations are a powerful tool that can be utilized to accurately capture the project’s Reviewer and Approver as well as the times the project was Reviewed and Approved. If you are not familiar with Automations, please check out this short blog post from Quick Base demonstrating the basics.
Logging Reviewer and Approver and Time
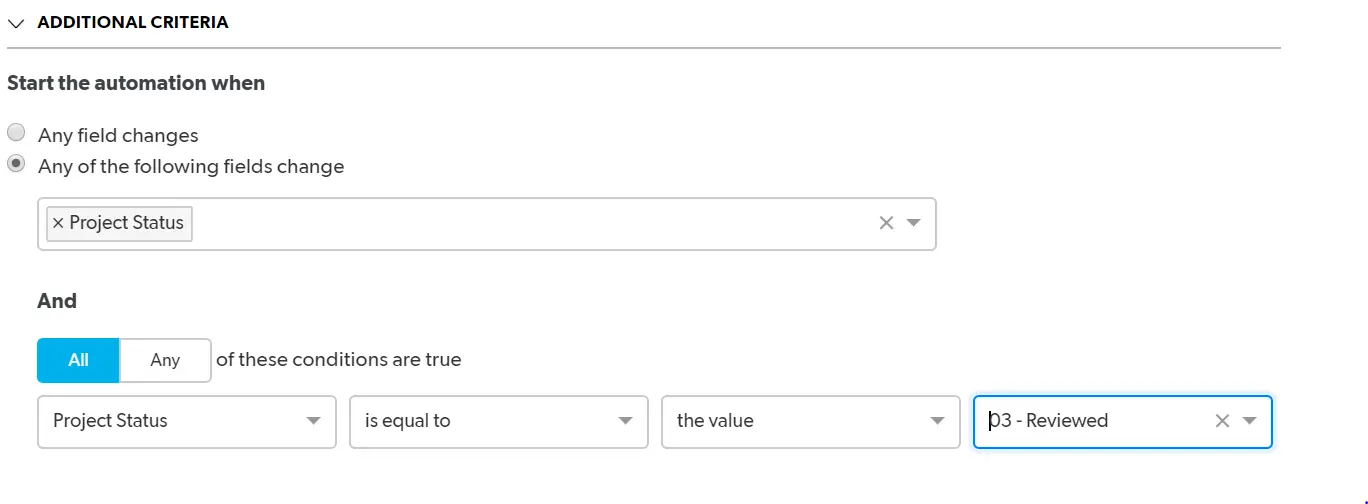
By default, Quick Base already captures the user who created the project (Record Owner) and the time the project was created (Date Created). But additional fields will have to be created for the Reviewer, Approver, Reviewed Date, and Approval Date. Furthermore, a status field with choices of ‘Reviewed’ and ‘Approved’ must exist to trigger the automation outlined below. Once all of the necessary fields exist, the steps below can be followed to log the Reviewer, Approver, Reviewed Date, and Approved Date.
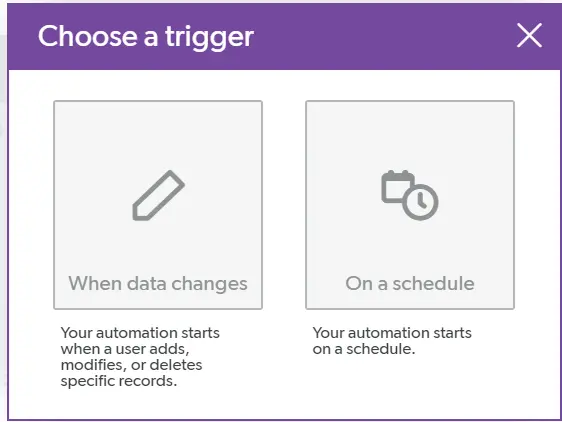
- Navigate to ‘Settings’, ‘Automations’, click ‘+ New Automation’ and select ‘When data changes’ as the trigger:
- To ensure the automation runs when intended, mark checked the ‘adds a record’ and ‘modifies a record’ options; then choose the table where the automation is to occur:
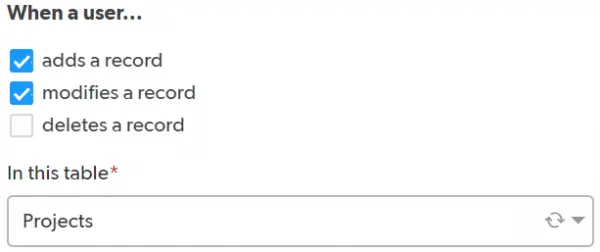
- To ensure the automation runs when intended, mark checked the ‘adds a record’ and ‘modifies a record’ options; then choose the table where the automation is to occur:
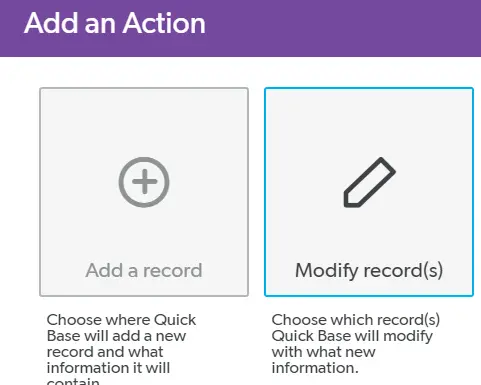
- Now the action can be created; click ‘Add Action’ and choose ‘Modify Records’ and choose the same table chosen in step 2:
- In the action, to ensure the correct record is updated, filter Record ID # to be equal to the Record ID # from the trigger (this will prevent other records from being updated unintentionally):

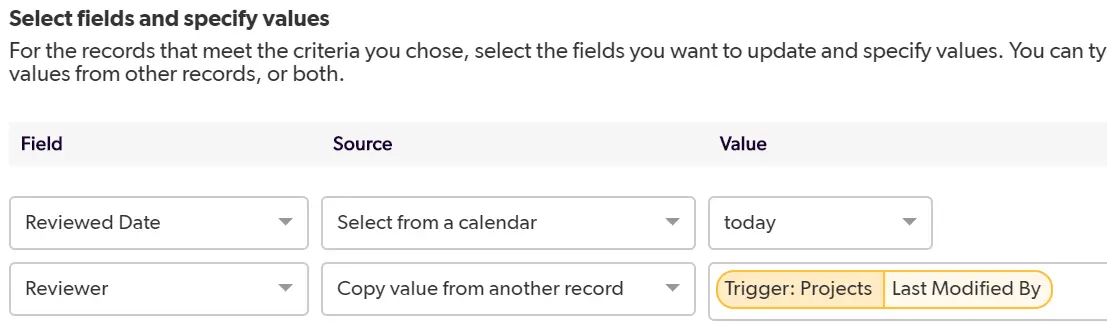
- Add two actions: one to write the Reviewed Date as today and one to write the Reviewer as the Last Modified By (ensure you choose the ‘new values’):
- Repeat steps 1 through 6, but change the review entries to the approved entries.
Similar to Automations, dynamic form rules can be used to automatically write in the Reviewer, Approver, and dates; however, dynamic form rules have one important limitation. If a project is edited in Grid Edit, then the from rule will not run and the Reviewer, Approver, and dates would not be captured. Automations will run irregardless if the project is updated in the form or in Grid Edit.
Nonetheless, form rules are still essential to building a good app; if you want to learn more about dynamic form rules, check out the article,Creating Form Rules.
- Author: TJ Lawless
- Email: tlawless@quandarycg.com
- Date Submitted: 2/24/2018

Industries
Resources


© 2026 Quandary Consulting Group. All Rights Reserved.
Privacy Policy